# ServiceNow REST Connector
The PMG ServiceNow REST Connector integrates ServiceNow with PMG's workflow automation platform. The Connector can support any number and mix of supported versions of ServiceNow environments simultaneously.
The ServiceNow REST Connector's activities make use of the ServiceNow REST Table API to communicate with ServiceNow.
This document covers the PMG ServiceNow REST connector's requirements and configuration steps.
# Defining the ServiceNow Server Instances
Follow the steps below to define one or more instances of ServiceNow to be supported by the ServiceNow REST Workflow Connector.
In the Workflow Designer, select Manage > Connector Configuration

Select "New Config" then Search and select the "ServiceNow REST" connector Type
Select "Create"

Select "New Scenario"

Provide a Scenario name. Use something that will help you differentiate what environment it is pointing to if you intend to have multiple, the select "Create"

Configure the Scenario.
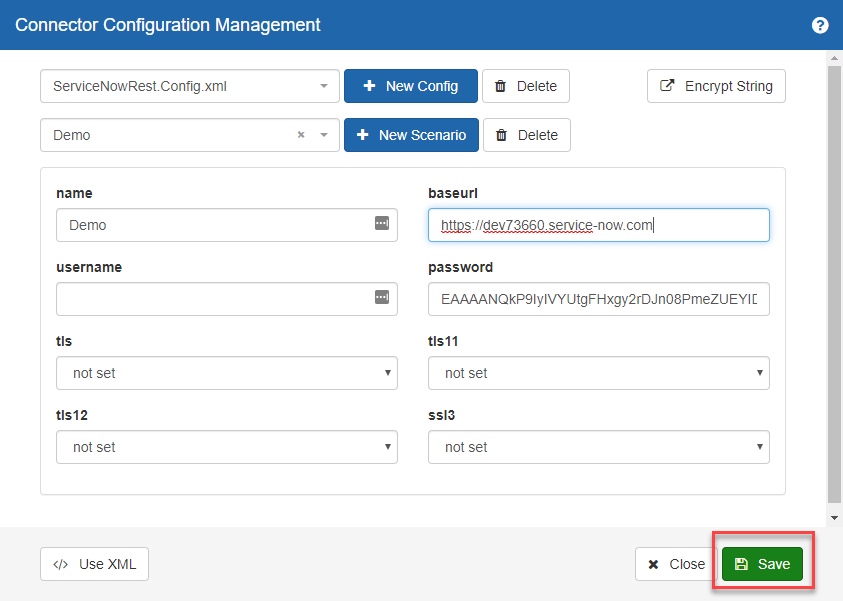
You will need to provide a base url, token url, username, and password to use the ServiceNow REST connector.
Passwords must be encrypted, to encrypt the password Click "Encrypt String" to navigate to the Encrypt String page.
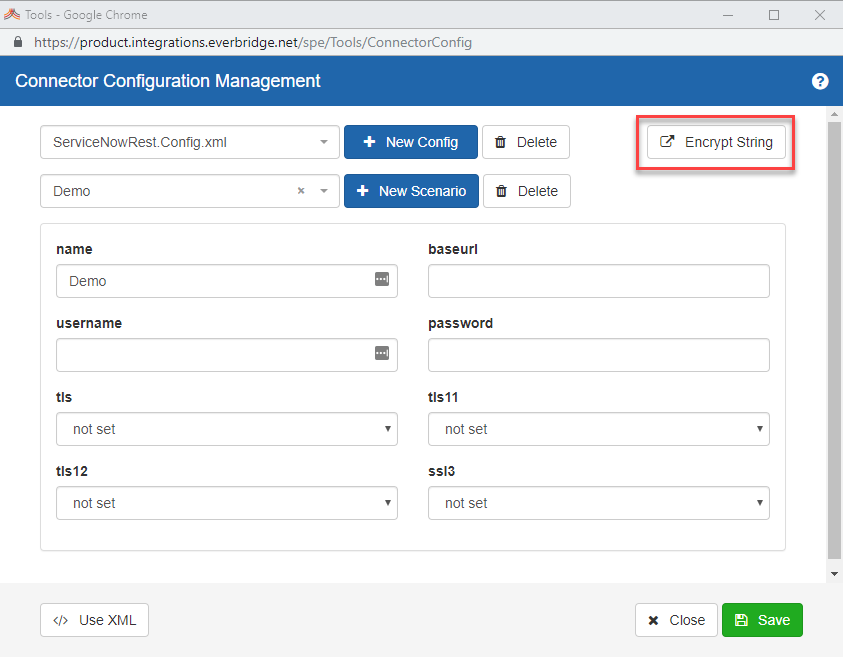
Encrypt and paste your password
1. Click in the String to Encrypt field and type your password.
2. Click "Encrypt" when done to copy the encrypted password to your clipboard.

Save your configuration.
# Create or Edit ServiceNow Actions
You can edit the provided ServiceNow REST actions or create new actions using the ServiceNow REST Action Builder.
Select "Manage" > "Actions"

Select ServiceNow REST from the Category dropdown.
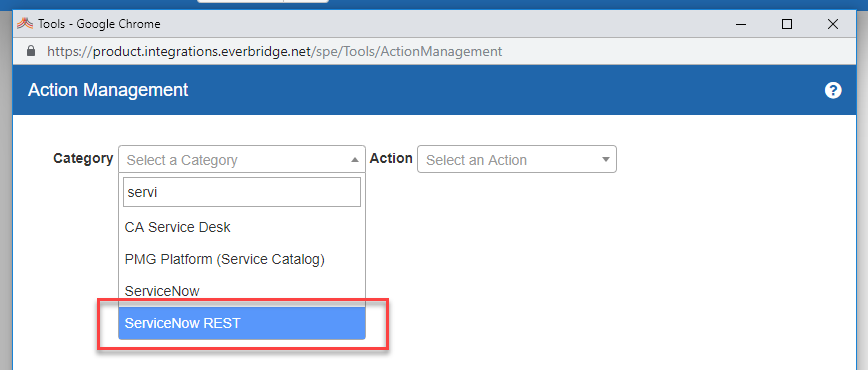
Unhide the Category.
Select the "Unhide Category" button to make the ServiceNow REST actions available from the Workflow Designer.

Select "Open Action Builder".
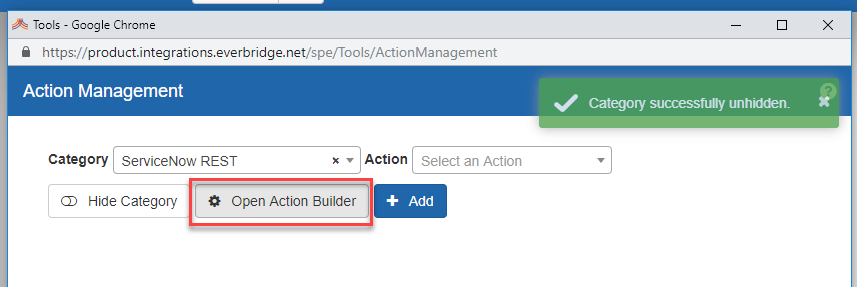
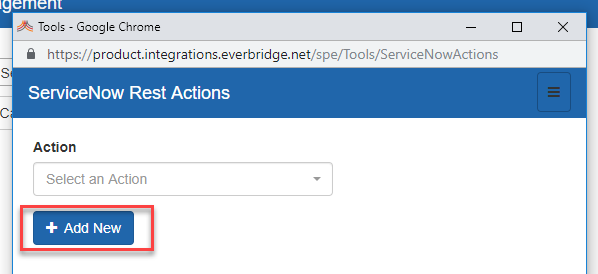
To create a new action from scratch, click the "Add New" button.
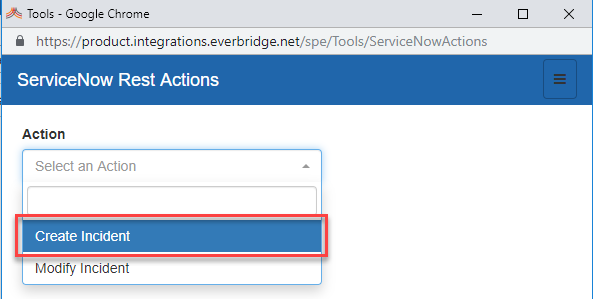
Alternatively, to edit an existing action click on the "Action" dropdown and select the action you would like to edit.
To Configure the Field Properties click the Configuration to inspect ServiceNow and select the required form properties for the action you wish to perform.

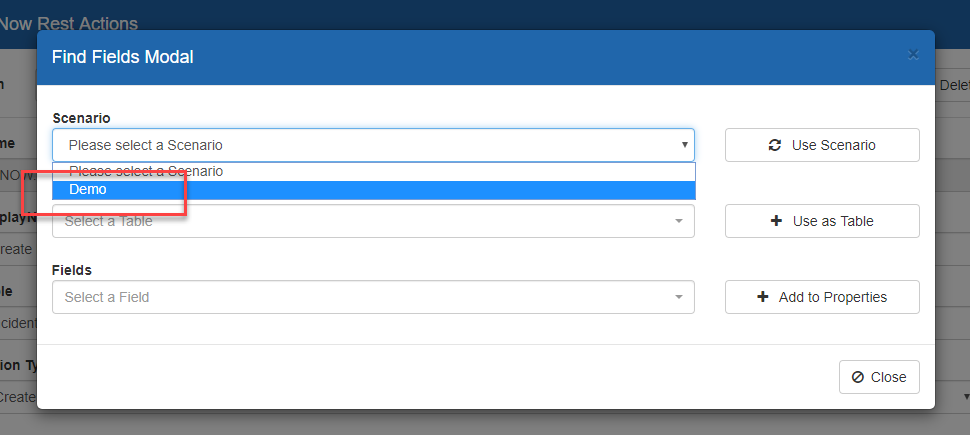
Select a scenario.
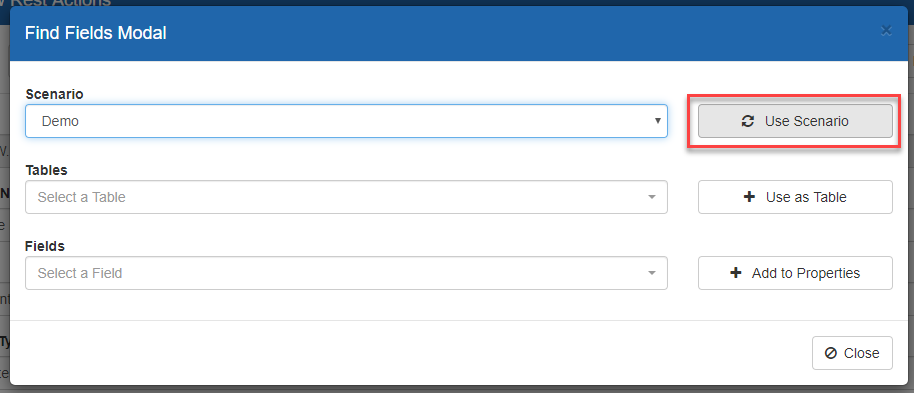
Select Use Scenario to update the action properties screen in the background.
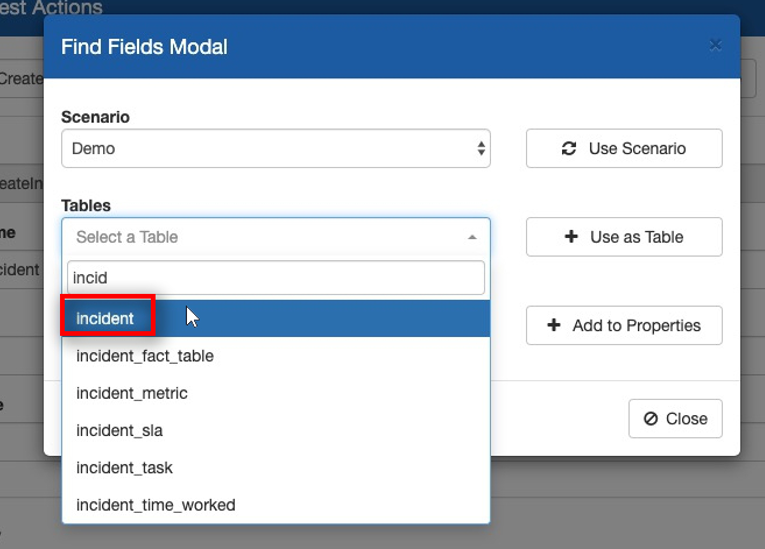
Select a Table.
Filter for the form tied to the action you want to create. i.e. To create an incident use "incident".
Click on "Use as Table" to update the action properties in the background.
Select one or more Fields.
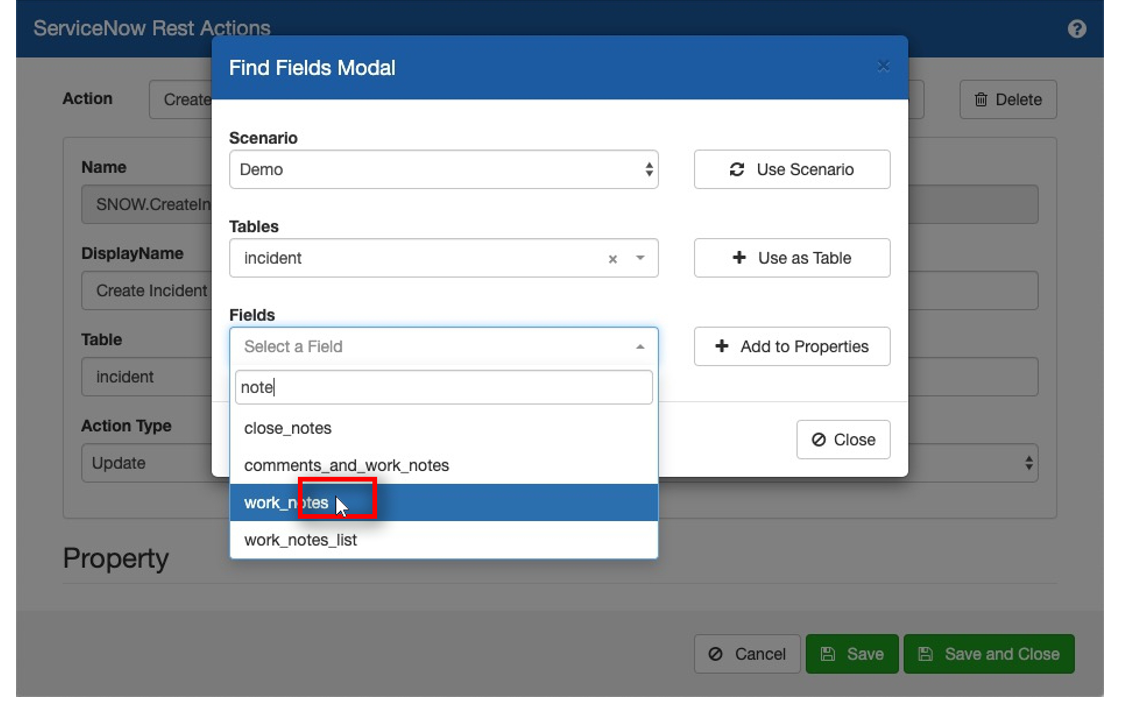
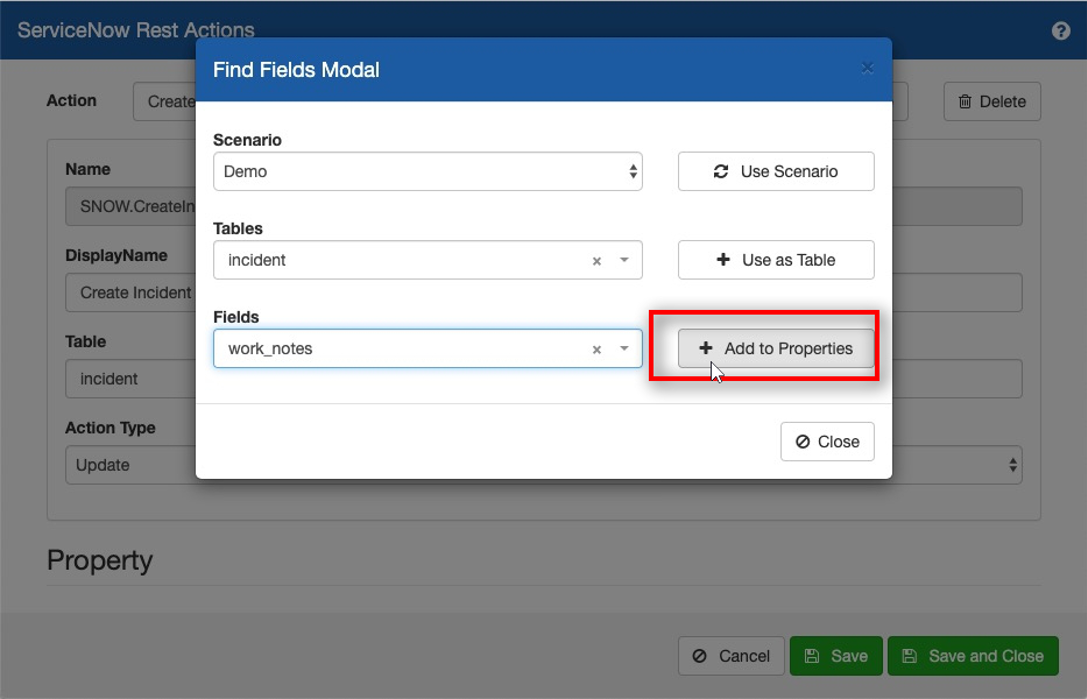
Click on "Add to Properties" to update the action properties in the background.
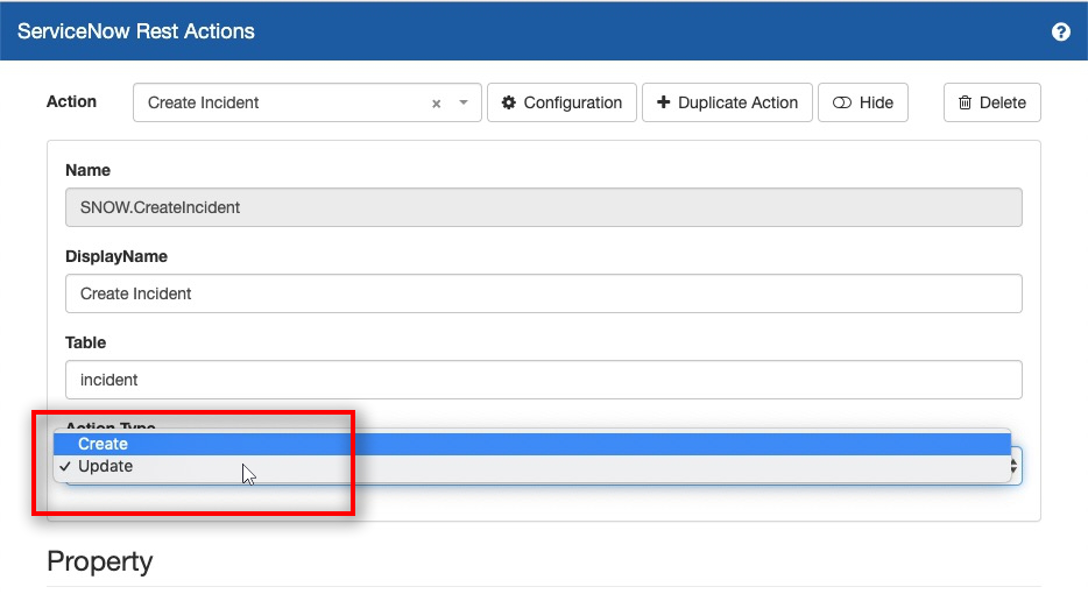
Select an Action Type.
If you wish to create a ServiceNow entry select "Create".
To modify a ServiceNow entry select "Update".
Configure Action Properties.
You can modify the action properties you added on the configuration screen here.
You can:
Mark them Mandatory
Modify the Field Type (text, select)
Provide default values/choices
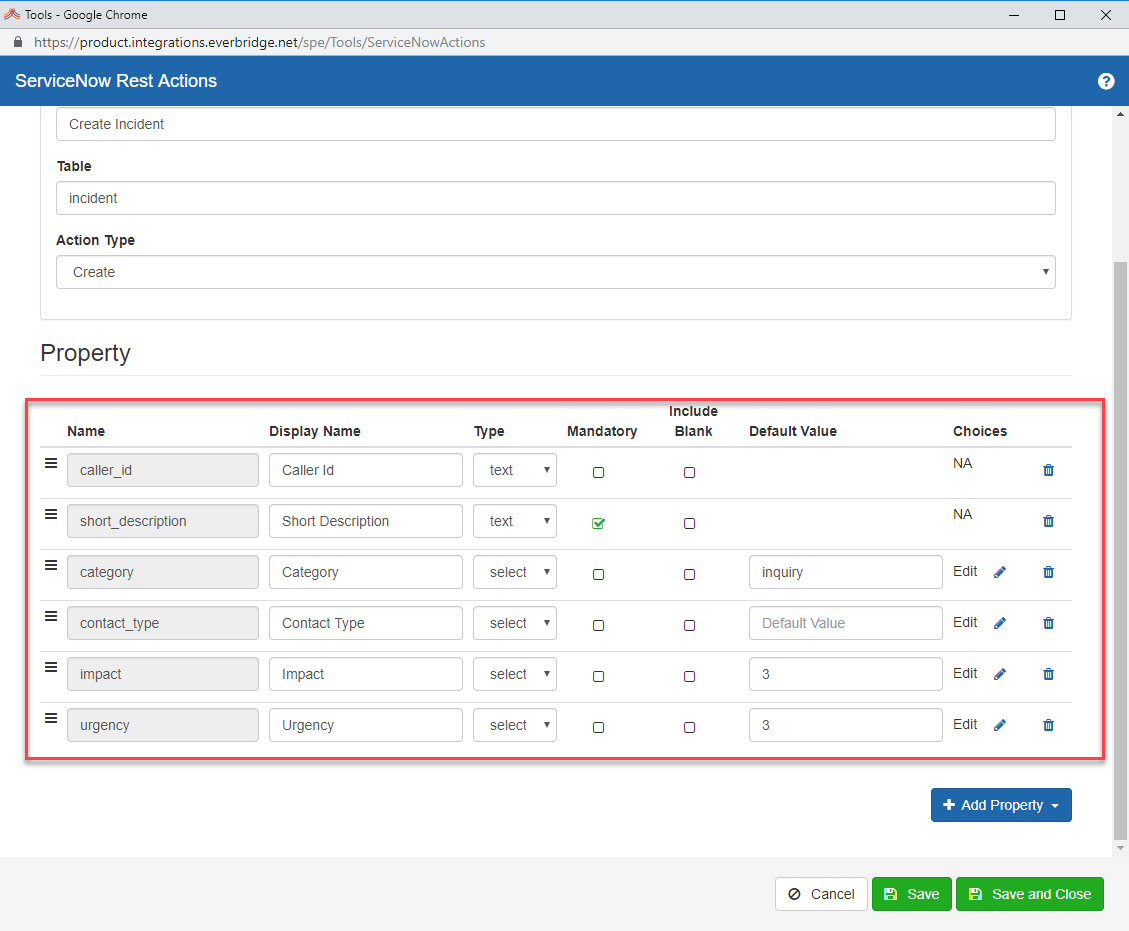
Click the pencil icon on a select type to add or update the available options.

Click "Add Choice" to add a new option.
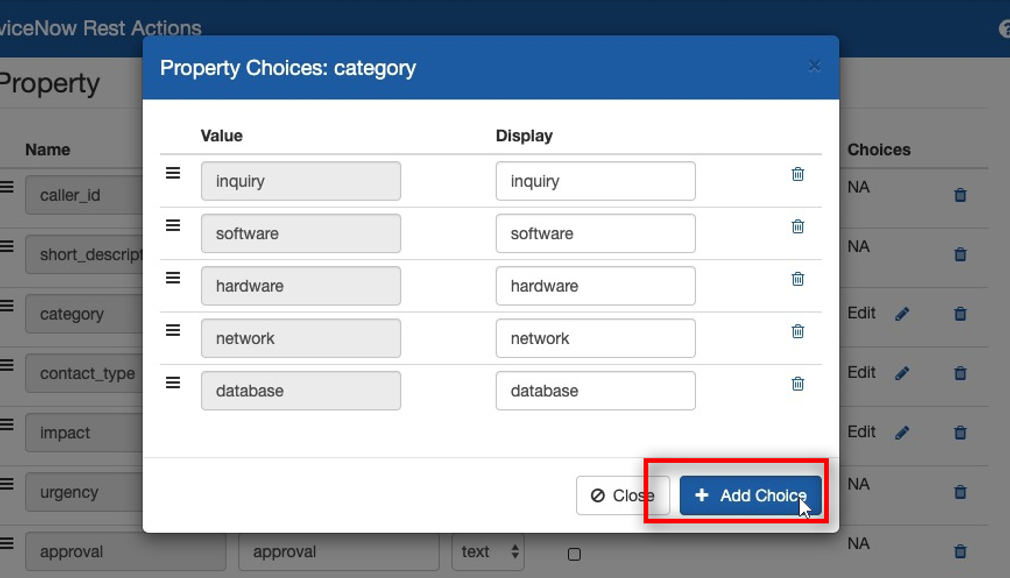
Then Save and Close.
# Creating a ServiceNow Entry
You can use the ServiceNow workflow actions to create any ServiceNow entry object including incidents, problem, tasks, and more.
Filter for the ServiceNow actions.
Type in: ServiceNow Rest
 Click and drag the Create Incident action.
1. Click on the Create Incident action on the left hand-side
2. Drag it over to the workflow canvas.
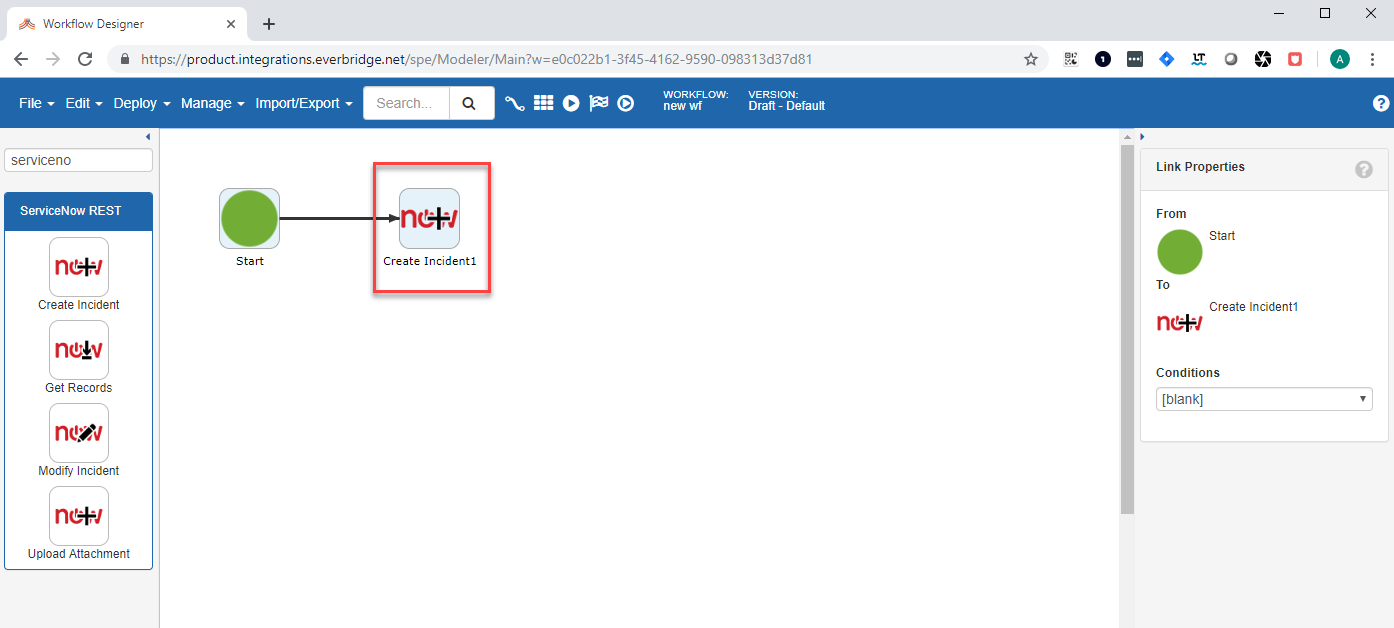
Fill in the required action properties as defined in the ServiceNow Action Builder.
You must provide an authentication scenario in the "Scenario" field.
Sample inputs:
Scenario: demo
Short Description: This is a test.
Category: inquiry
impact: 3
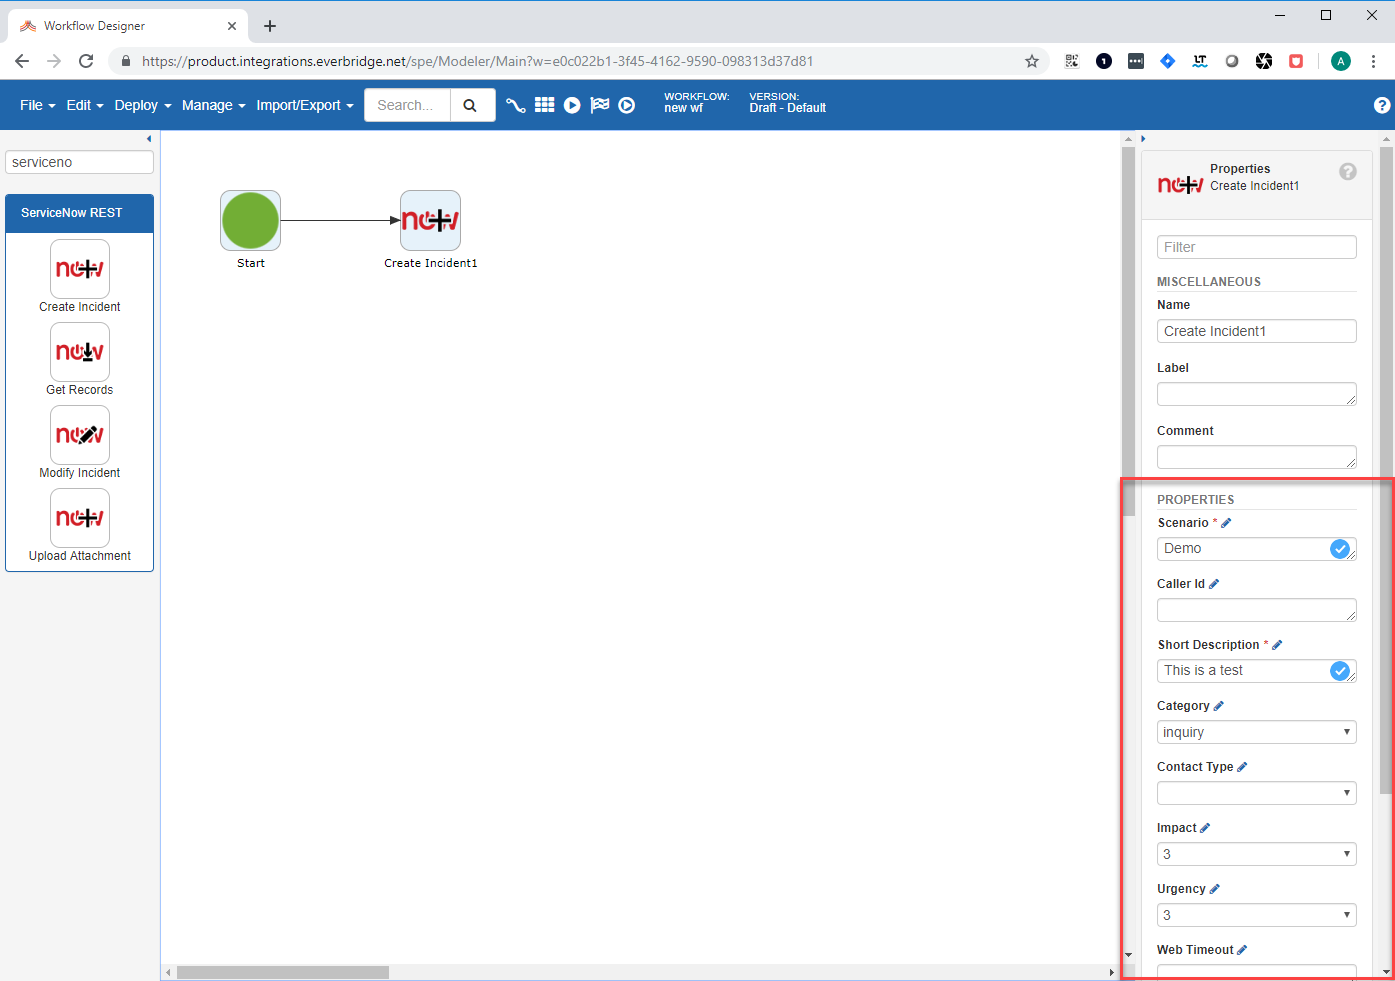
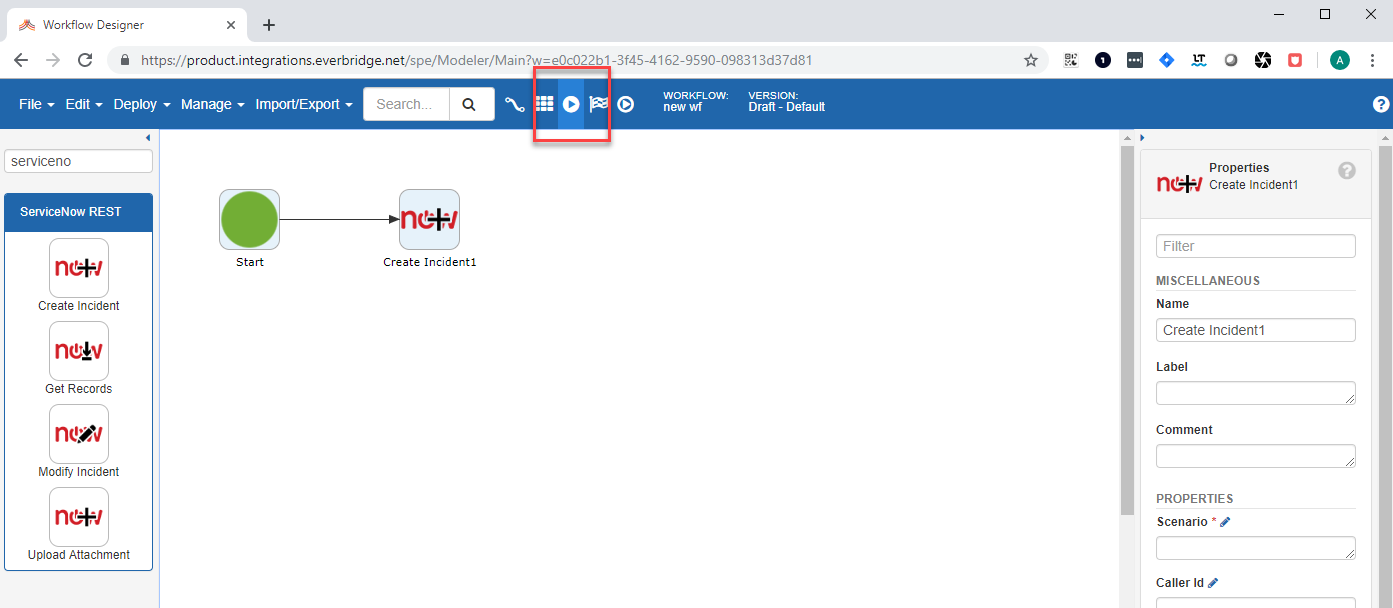
Click on the "Deploy and Play" button to execute your workflow.
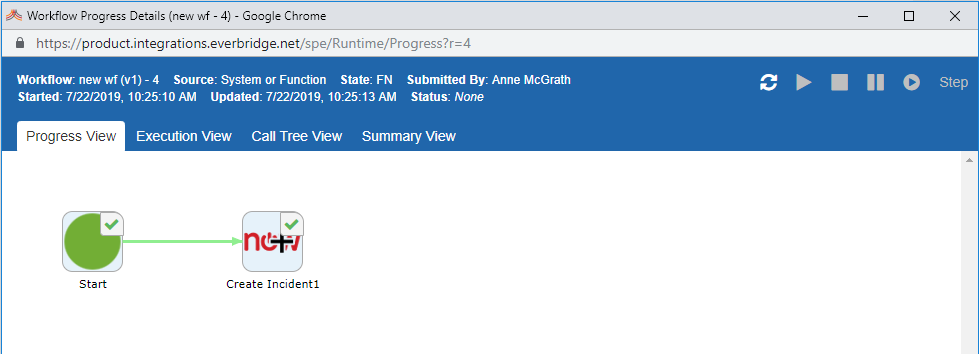
You can see whether the action executed successfully from the process details screen.
# Querying for a ServiceNow Entry
You can use the ServiceNow workflow actions to query for any ServiceNow entry object including incidents, problem, tasks, and more.
Filter for the ServiceNow actions.
Type in: ServiceNow Rest
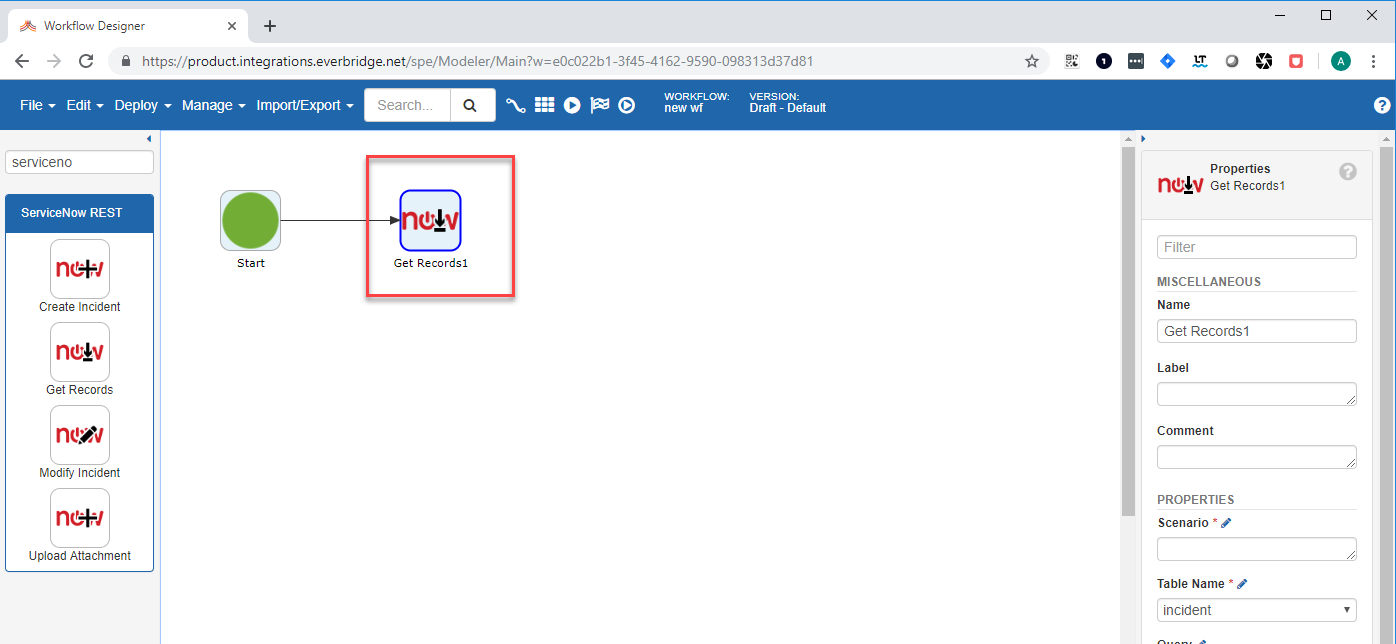
Click on the Click and drag the Get Records action.
Get Records action on the left hand-side
Drag it over to the workflow canvas.
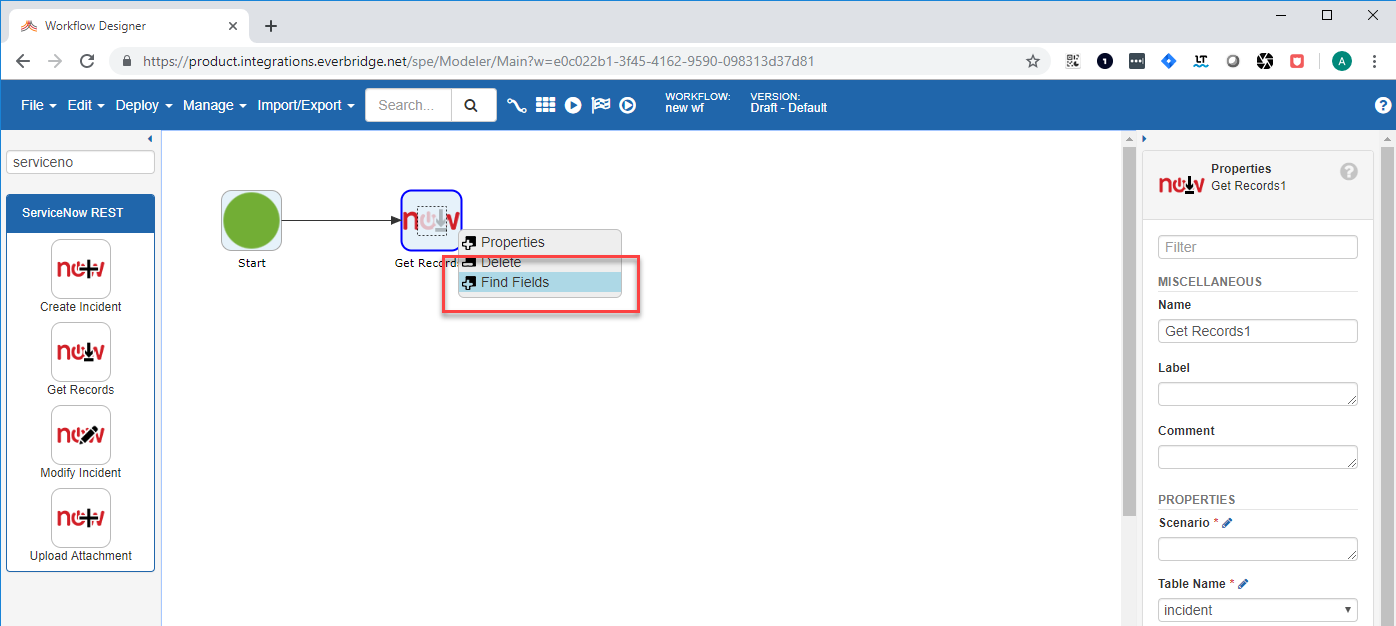
Right click on the action and click "Find Fields" to open the Find Fields dialog.
Enter a scenario name. (i.e. Demo)
Click on "Use Scenario" to connect to your ServiceNow instance.
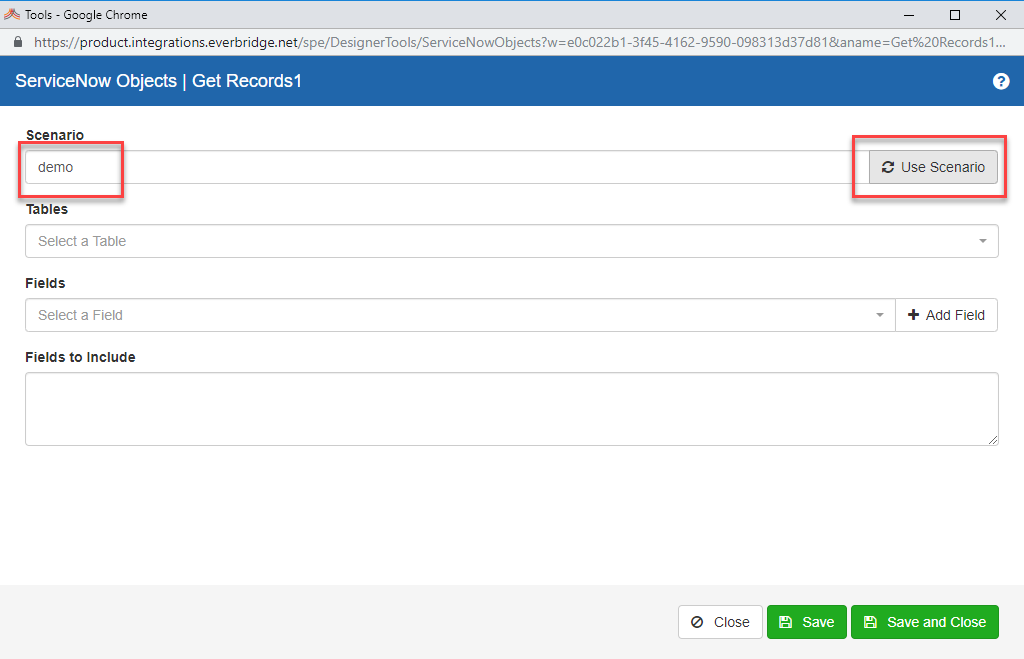
Select the record type you want to query from the Tables drop down. (i.e. incident)
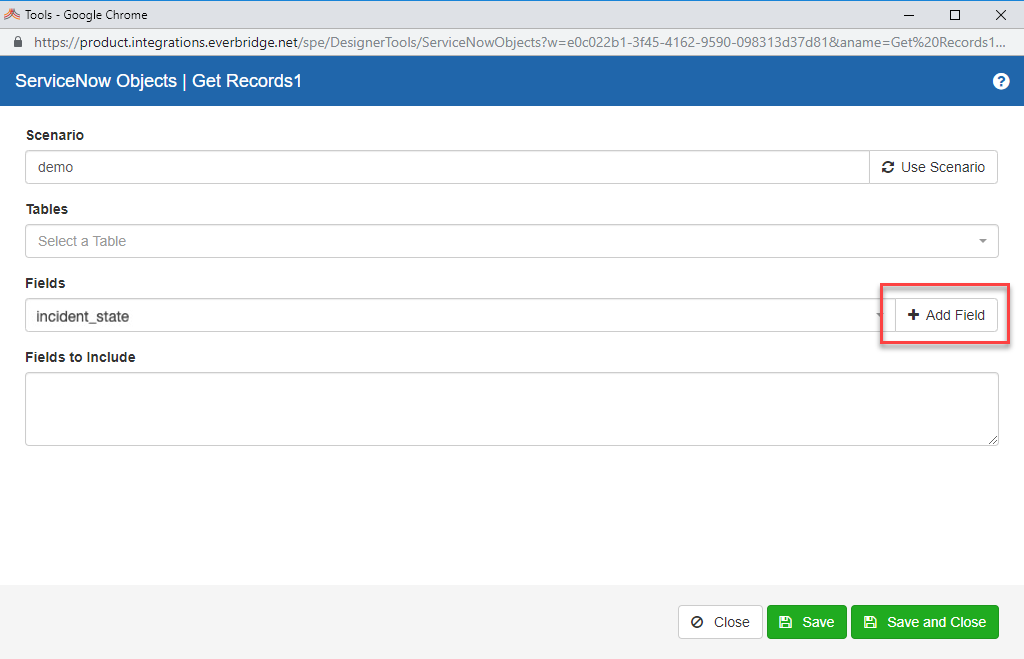
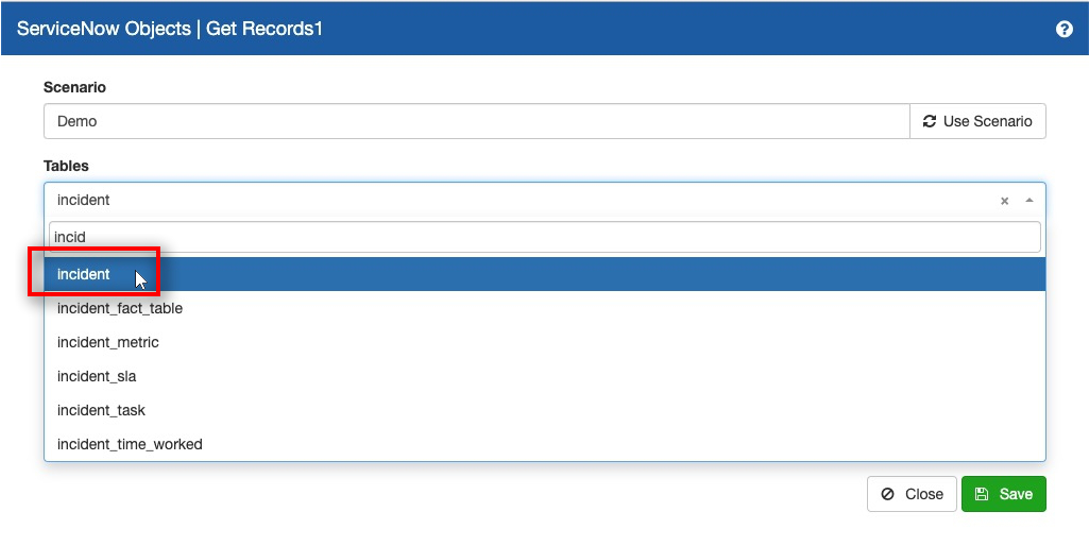 Select the fields you want to return then Save your configuration.
- Click on "Add Field" for each one.
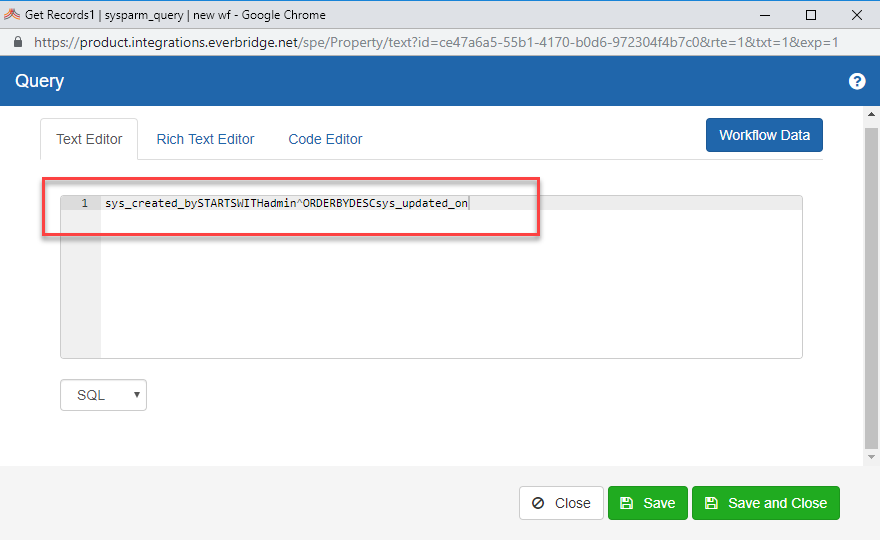
In the action properties, select the pencil icon to specify a query.

Type in a query like the one pictured below, then click "Save and Close"
Specify the max number of results to return.
i.e. 10
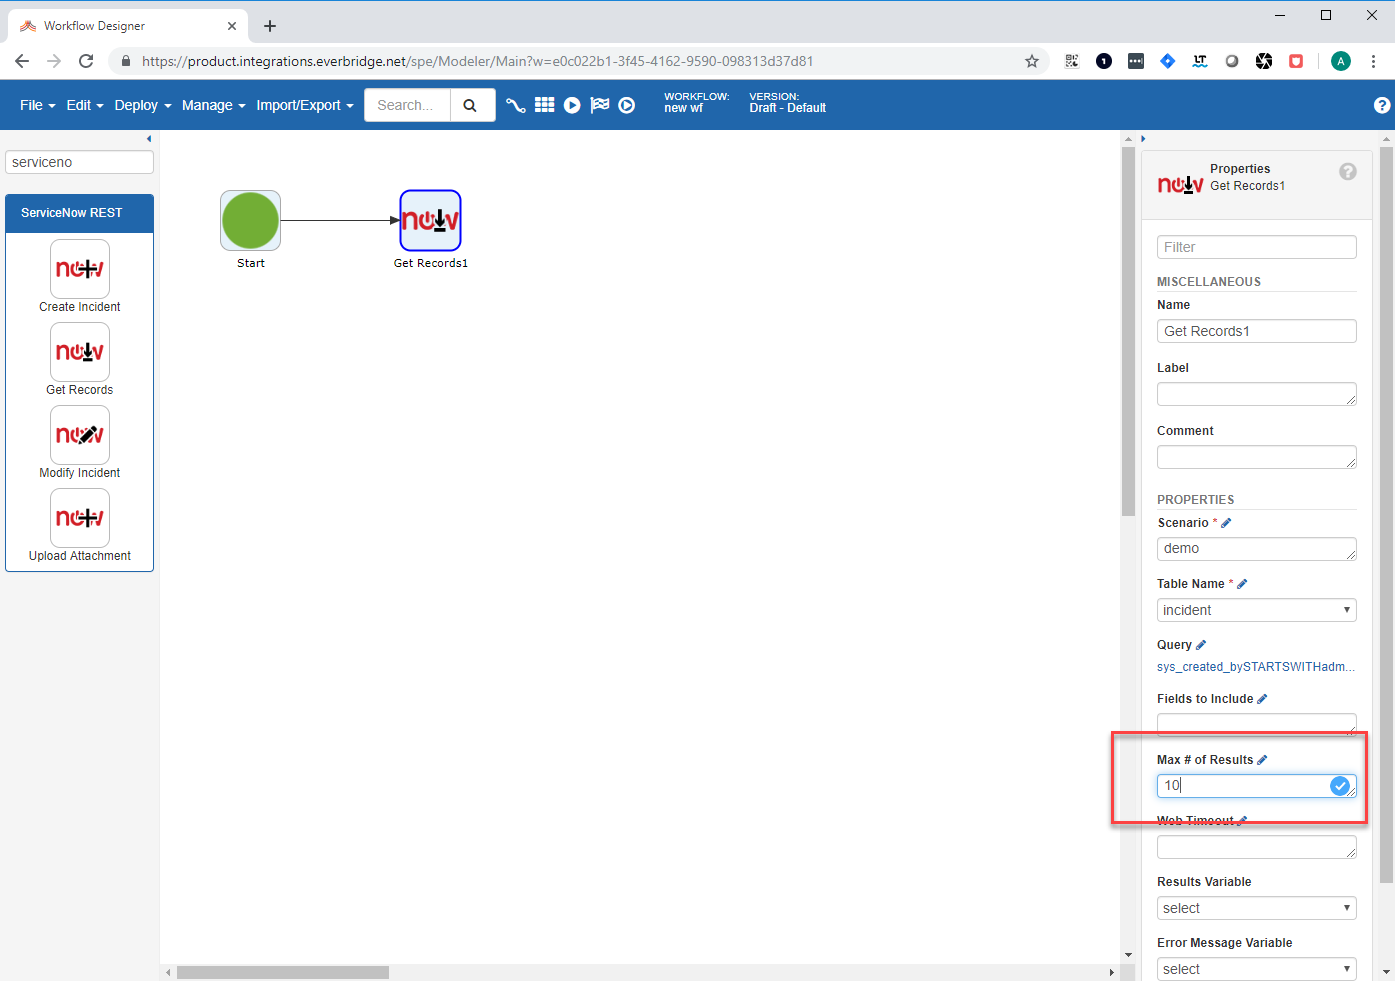
Create a new variable to store your results. You can also store results directly to a workflow object.
Click on the "Start" action.
Click on "Click to add" under Variables.
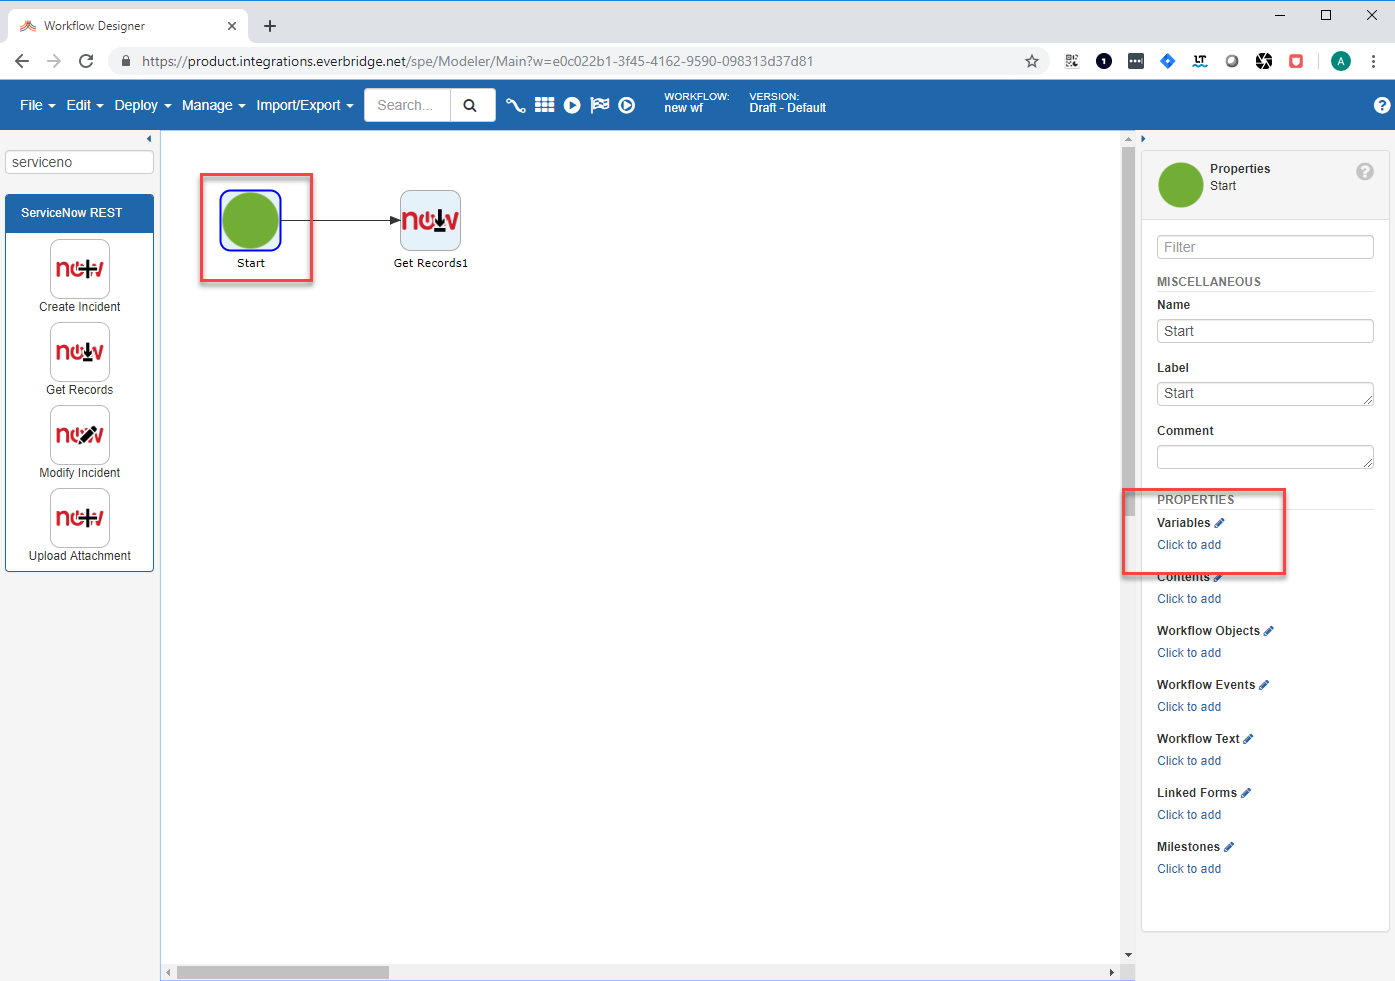
Add a Variable called "Results"

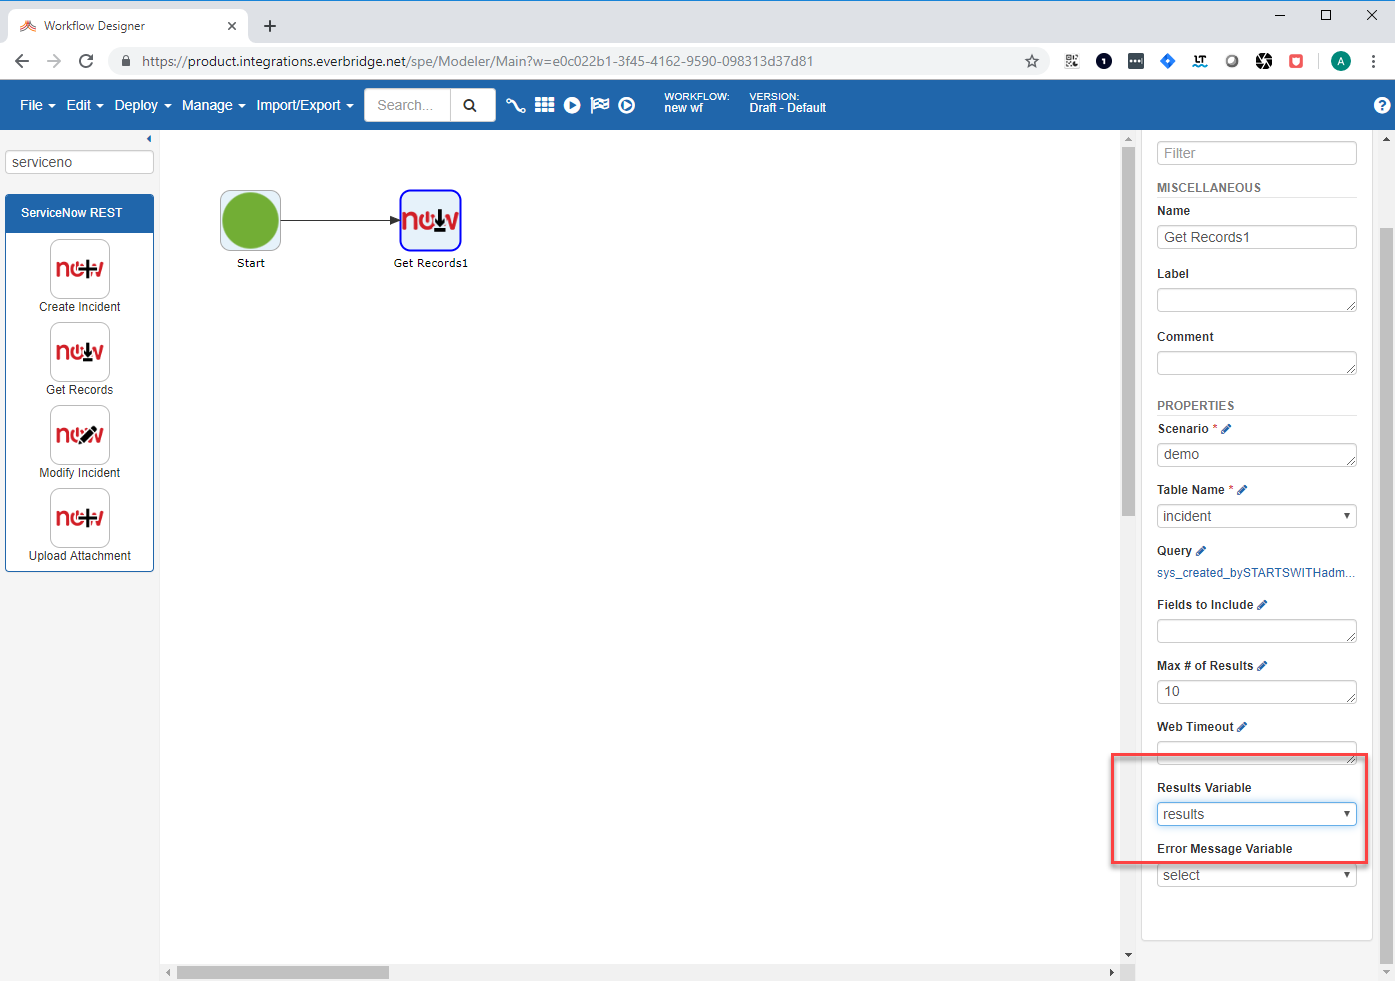
Select the "Get Record1" action and select your new variable on the "Results Variable" dropdown.
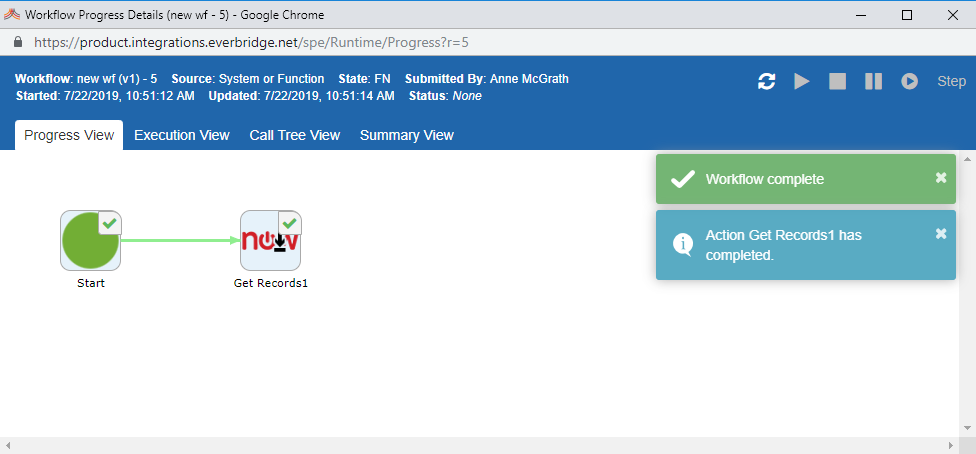
Select "deploy and Play" to execute the workflow.
Click on the "play" button to execute your workflow.
You can see whether the action executed successfully from the process details screen.
# ServiceNow Initiated Information Transmission
# Setup System Web Services
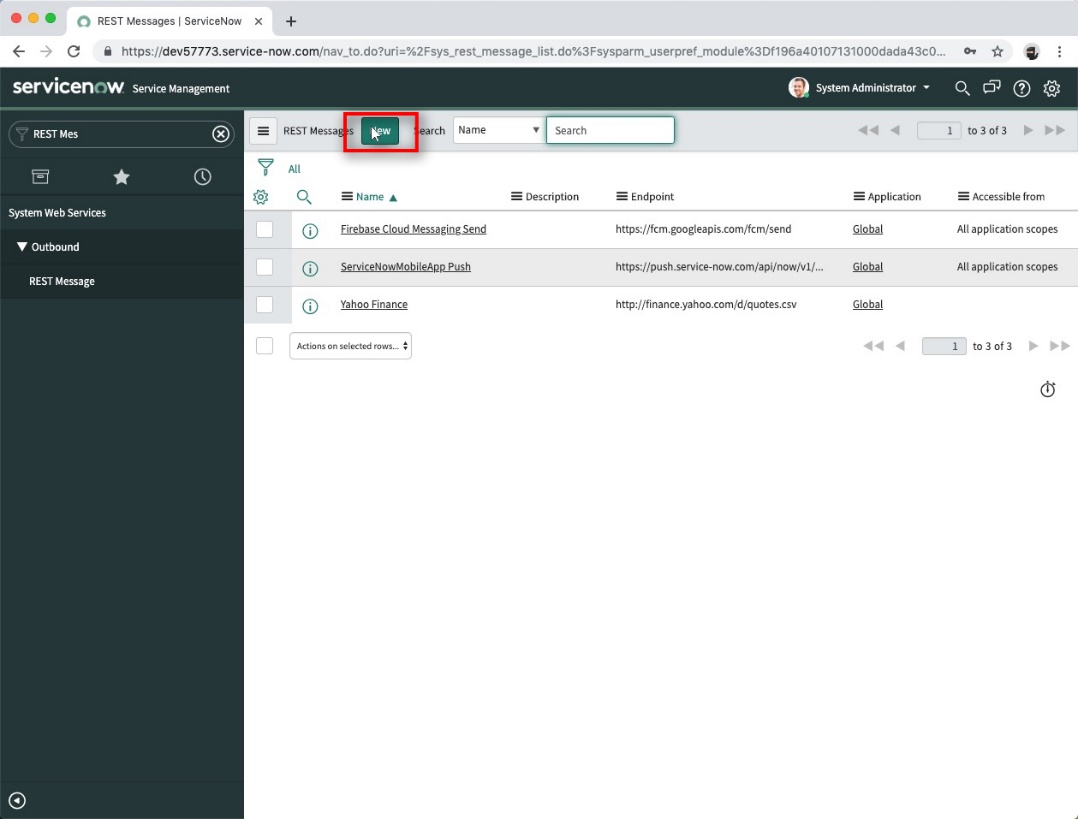
In ServiceNow, search for REST Message and select the REST Message Outbound Web Service.

Click on "New" to create a new service.
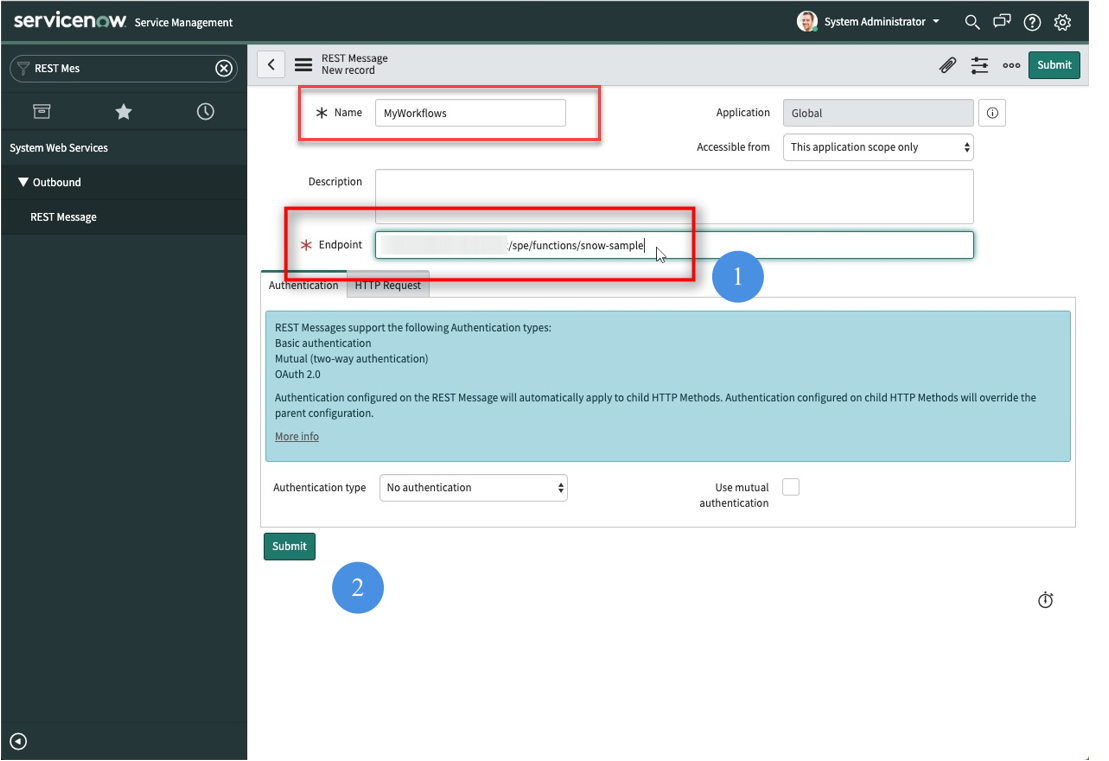
Provide a Name. (i.e. MyWorkflows)
Provide the PMG endpoint. (i.e. https://hostname/spe/functions/snow-sample (opens new window))
Click Submit.
# Add an HTTP Method
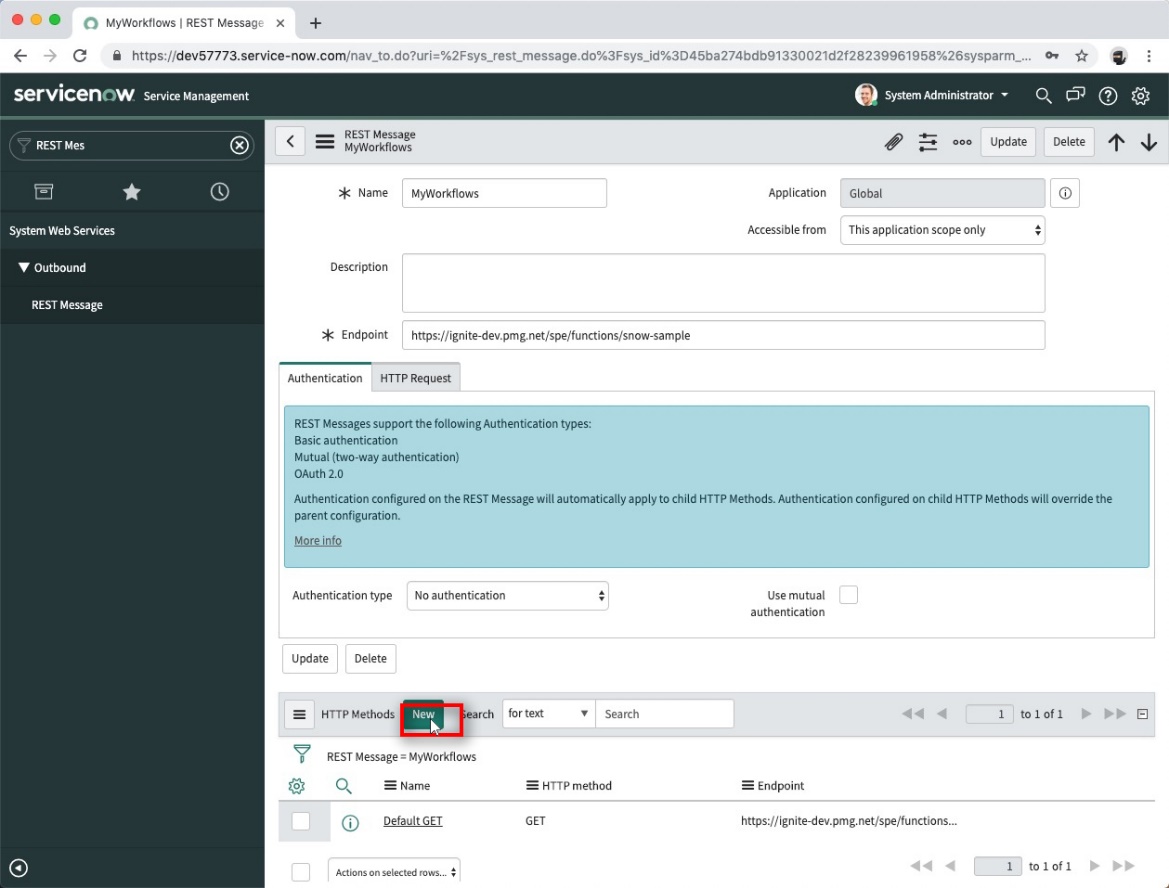
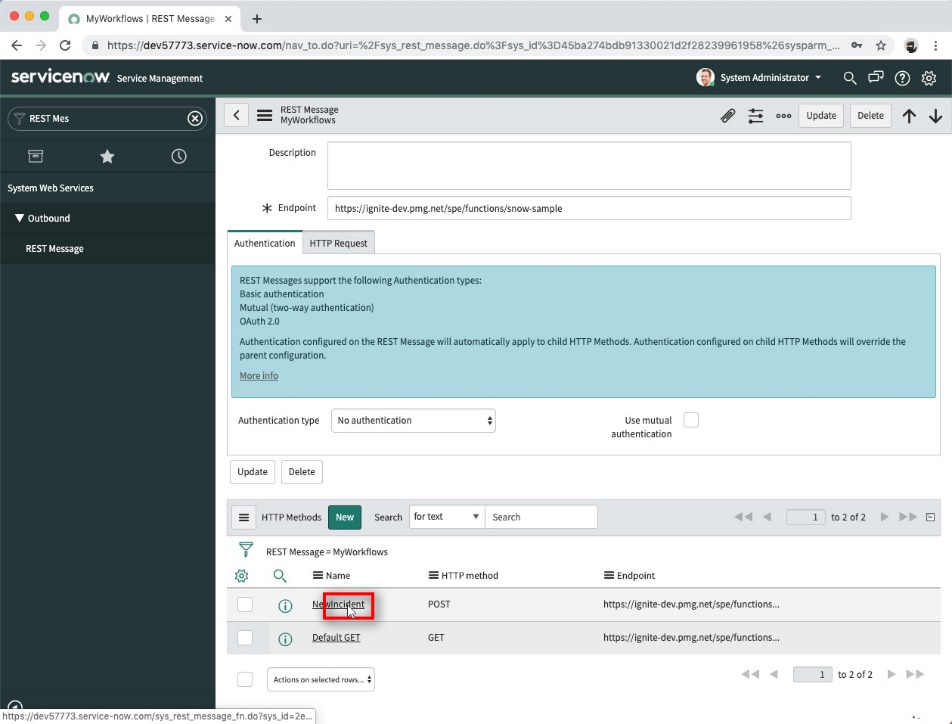
Click on the REST Message record you just created.

Click "New" to add a new HTTP Method.
Provide a Name. (i.e. NewIncident)
Select POST for HTTP Method.
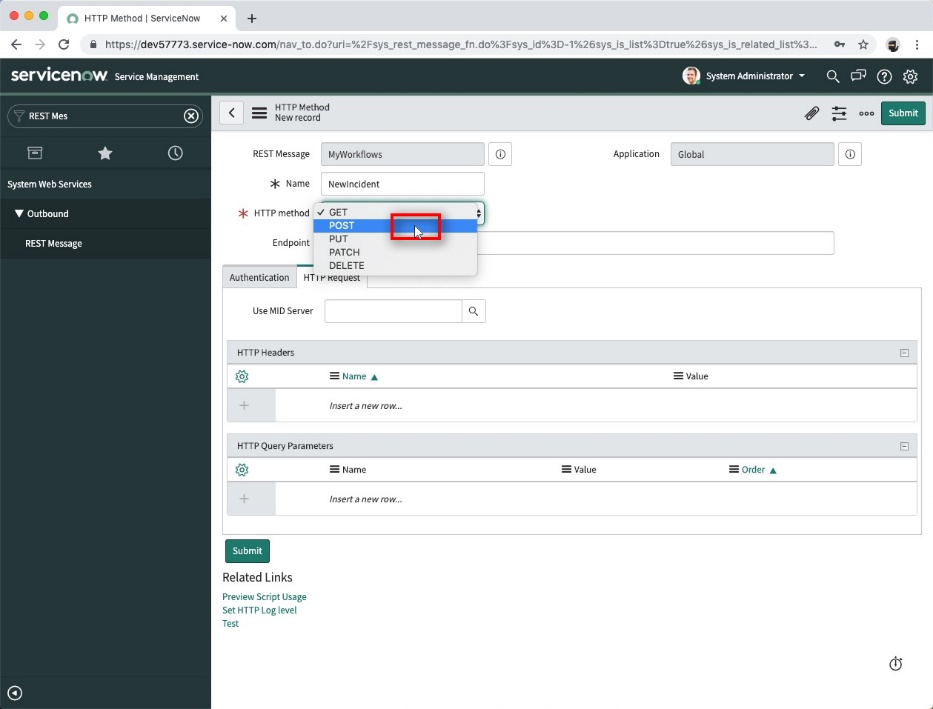
Provide the PMG End point. (i.e. https://hostname/spe/functions/snow-sample (opens new window))

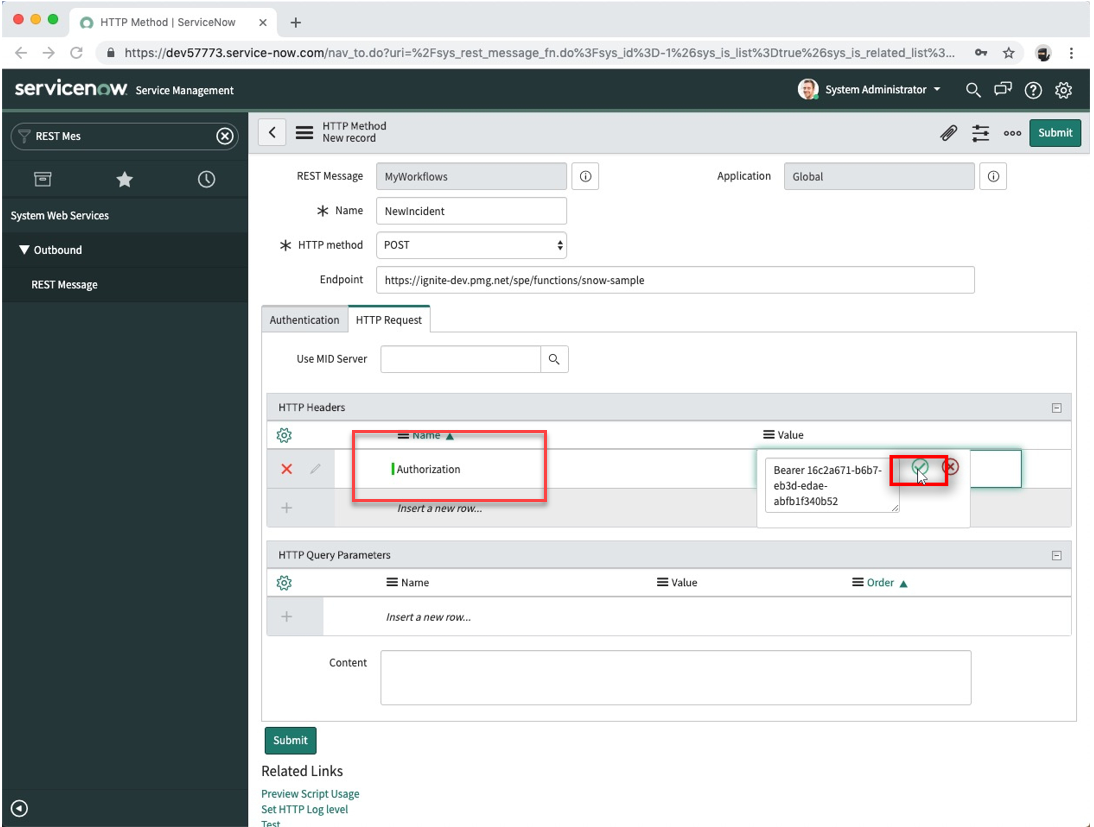
# Configure HTTP Headers
In the HTTP Header section,
- Enter "Authorization" as a Name
<!-- -->
- Enter your API key. (i.e. Bearer API Key) as a value
# Configure HTTP Query Parameters
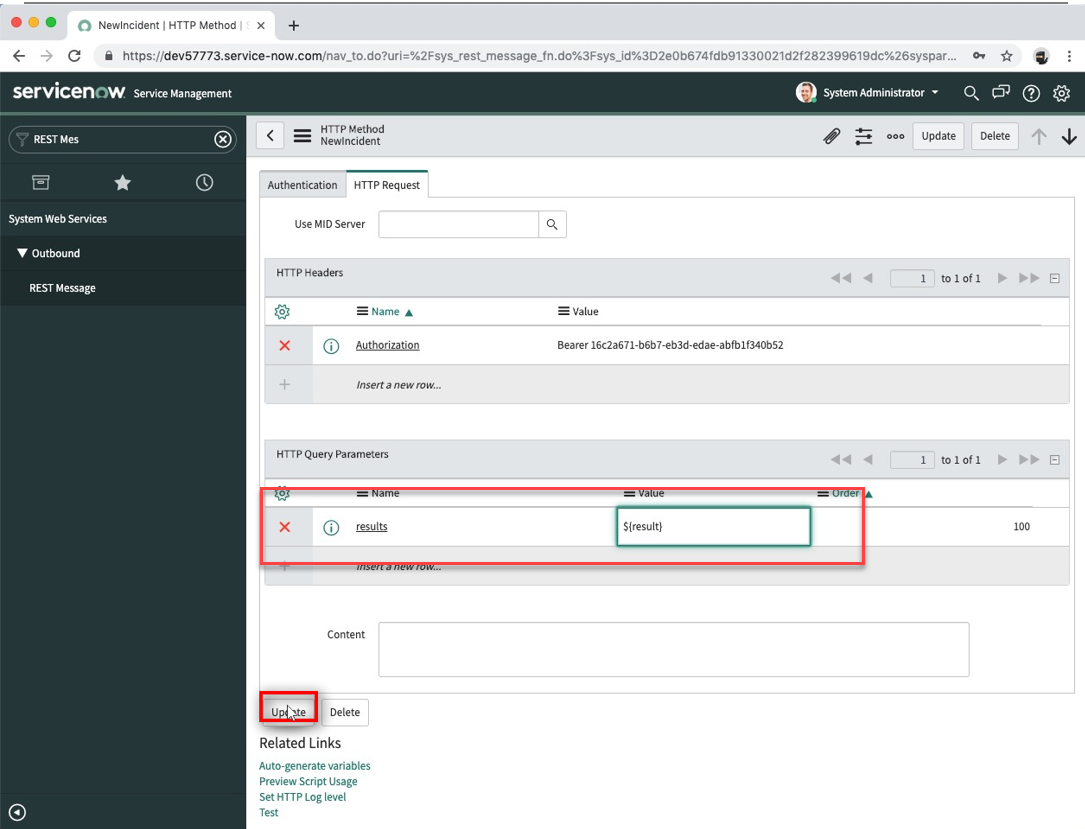
In the HTTP Query Parameters section,
In the Name column, enter the name of one or more workflow variables
In the Value column, enter the name of your variable using following syntax ${variable name}
Click Update to save your changes.
Select your new HTTP Method.
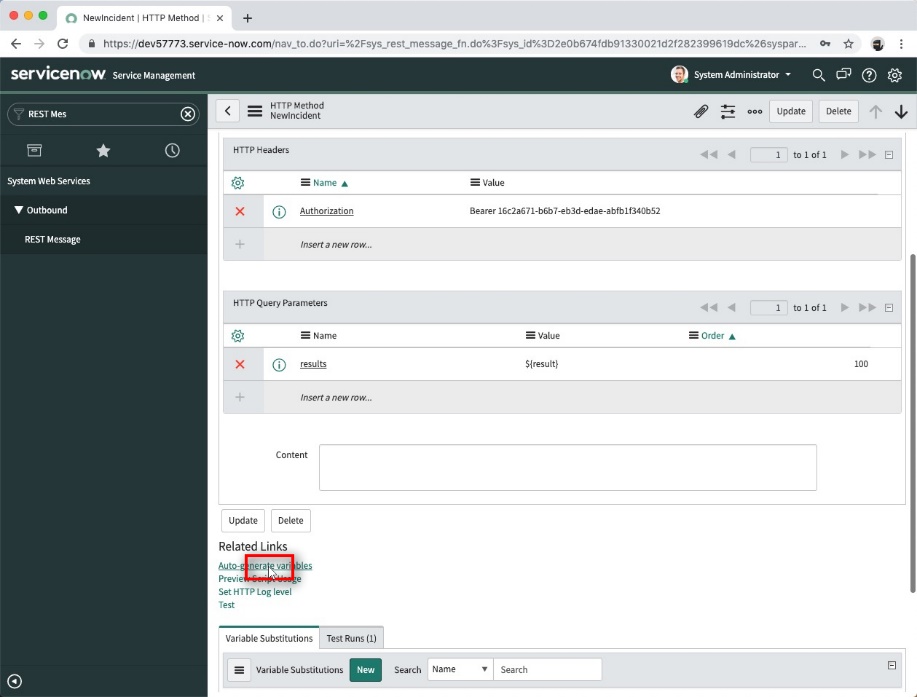
Click on "Auto-generate variables".
Add default values if desired for testing AND SELECT "Test"
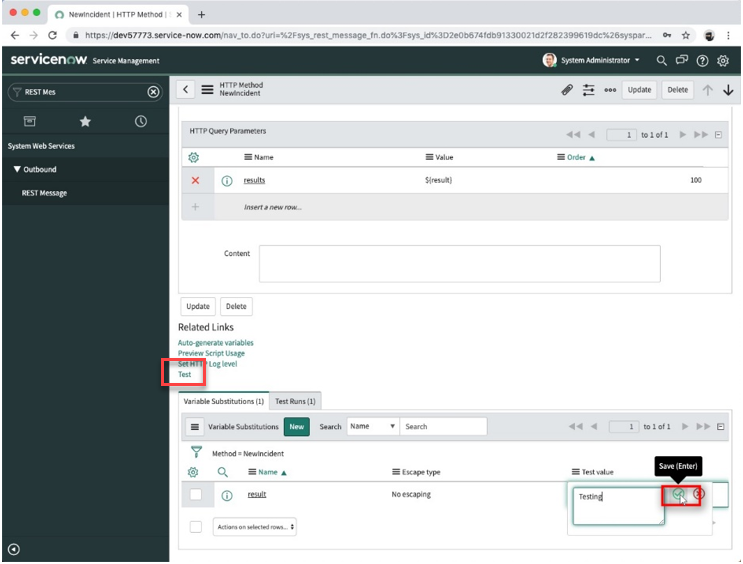
You will see HTTP status 200 if the web service call was successful.
Click "Update" to leave the page.
Select you HTTP Method again and select Preview Script Usage.
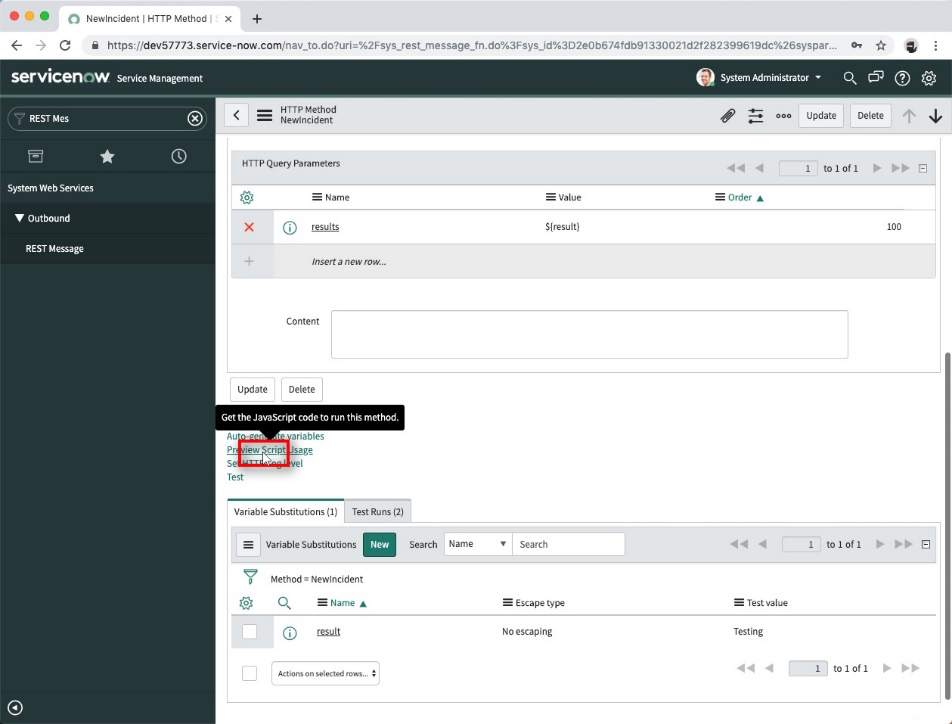
Copy the script onto your clipboard. You will need this for the next step.

# Set Up Business Rules
Search for an select "Business Rules".
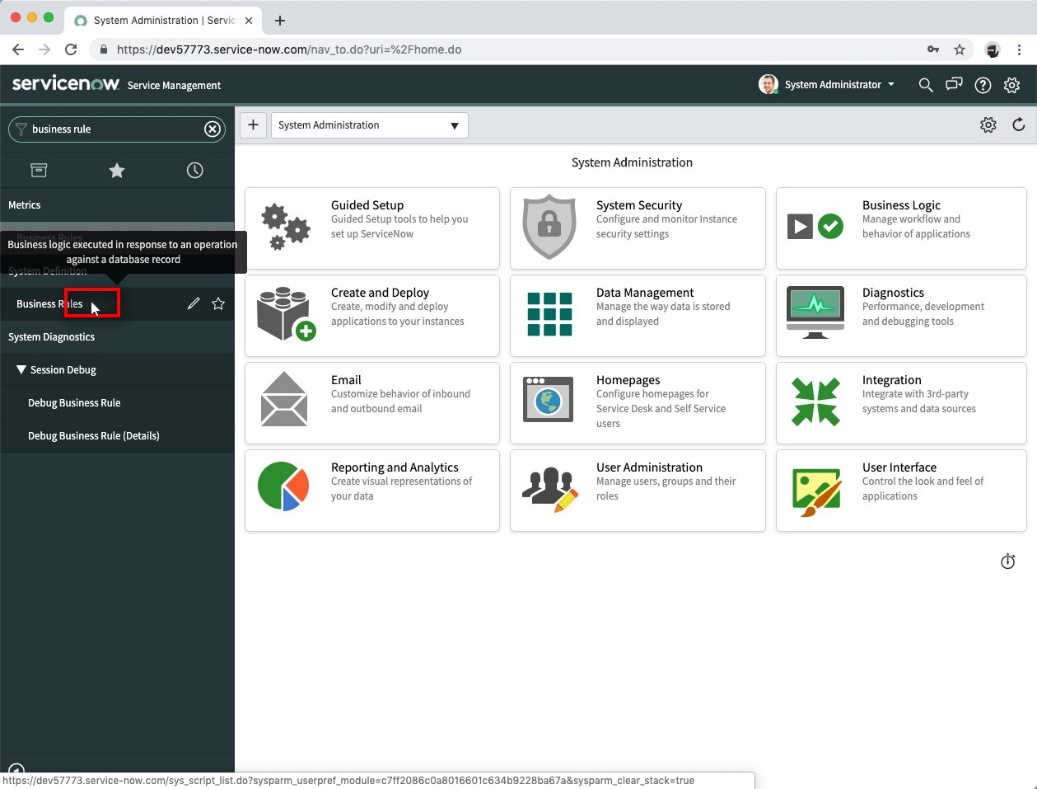
Click "New" to create a new Business Rule.
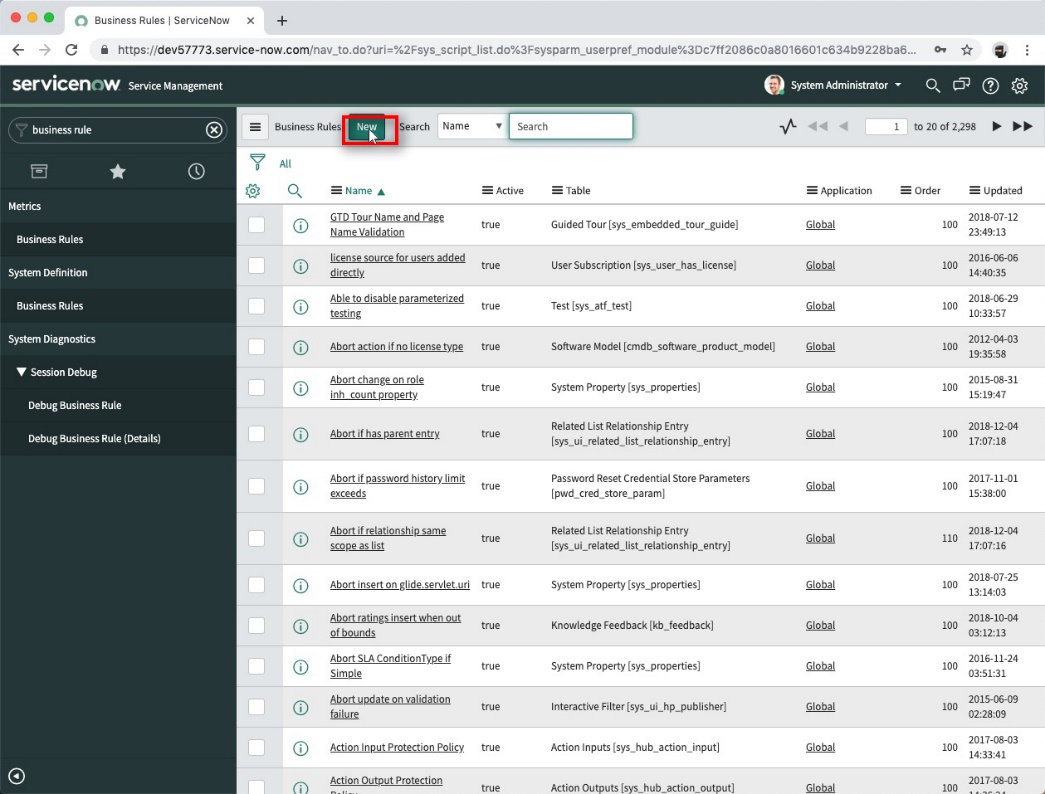
Provide a Name and Select a Table.
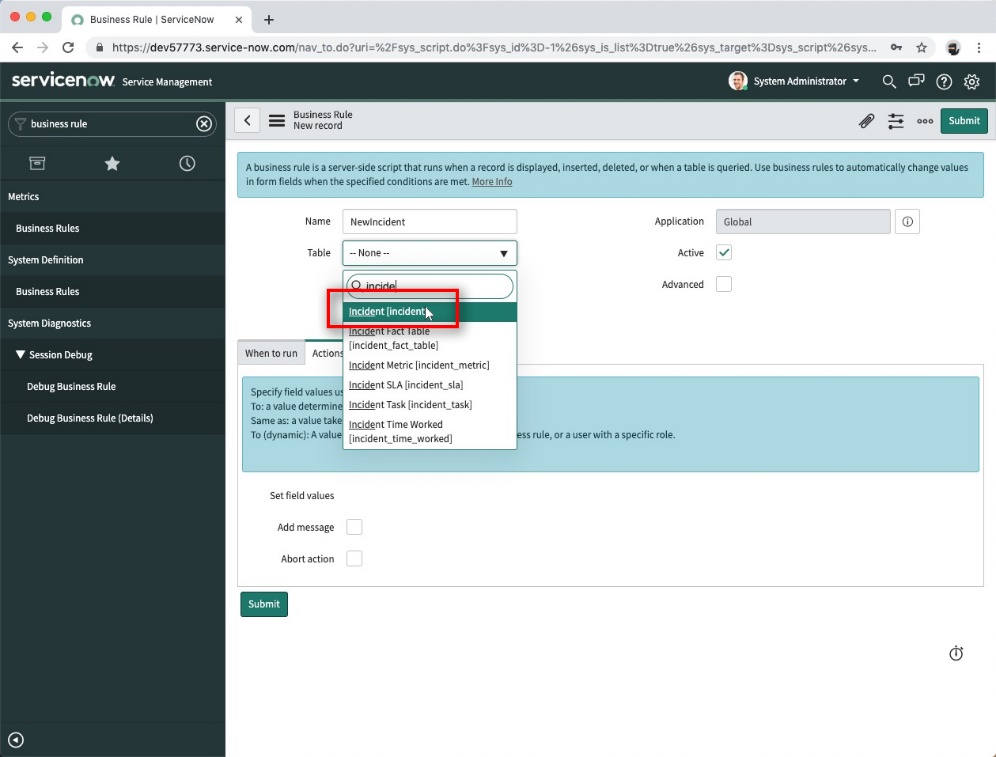
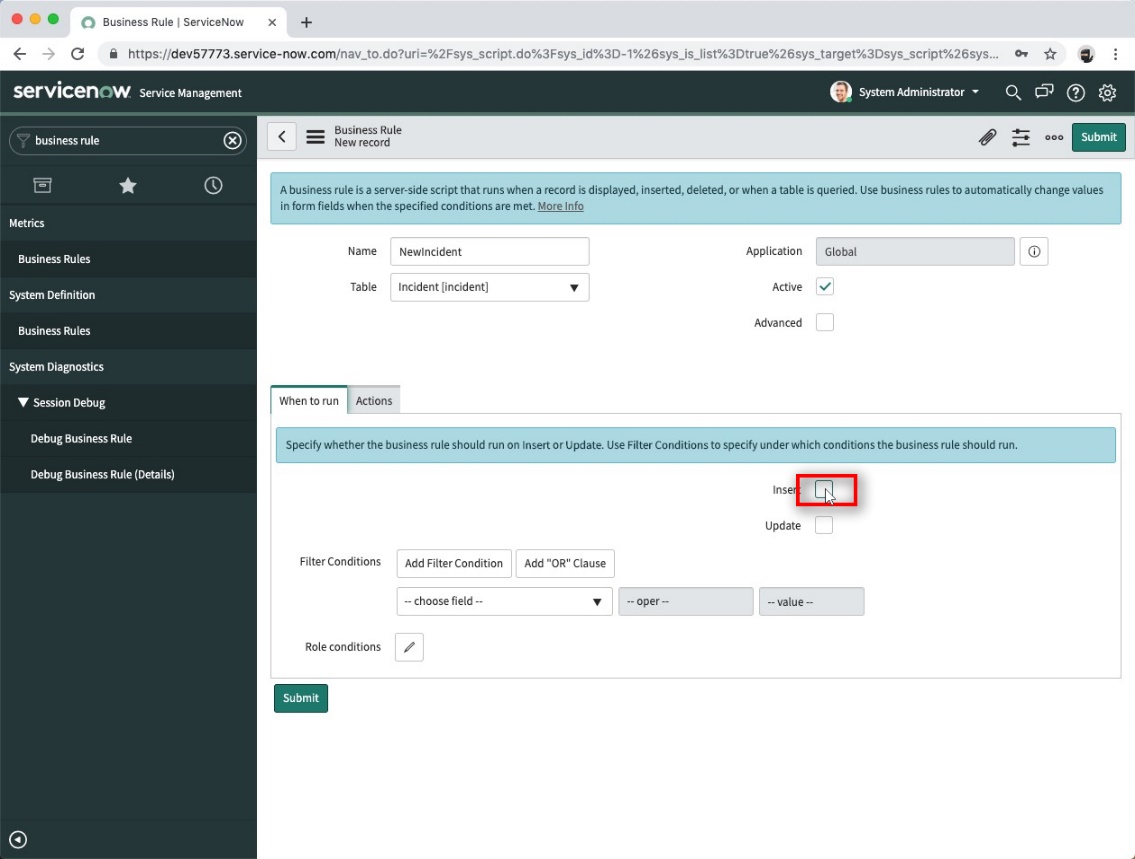
Select the "When to run" tab and select Check "Insert".
If you want the business rule to when the incident is updated as well check the Update box.
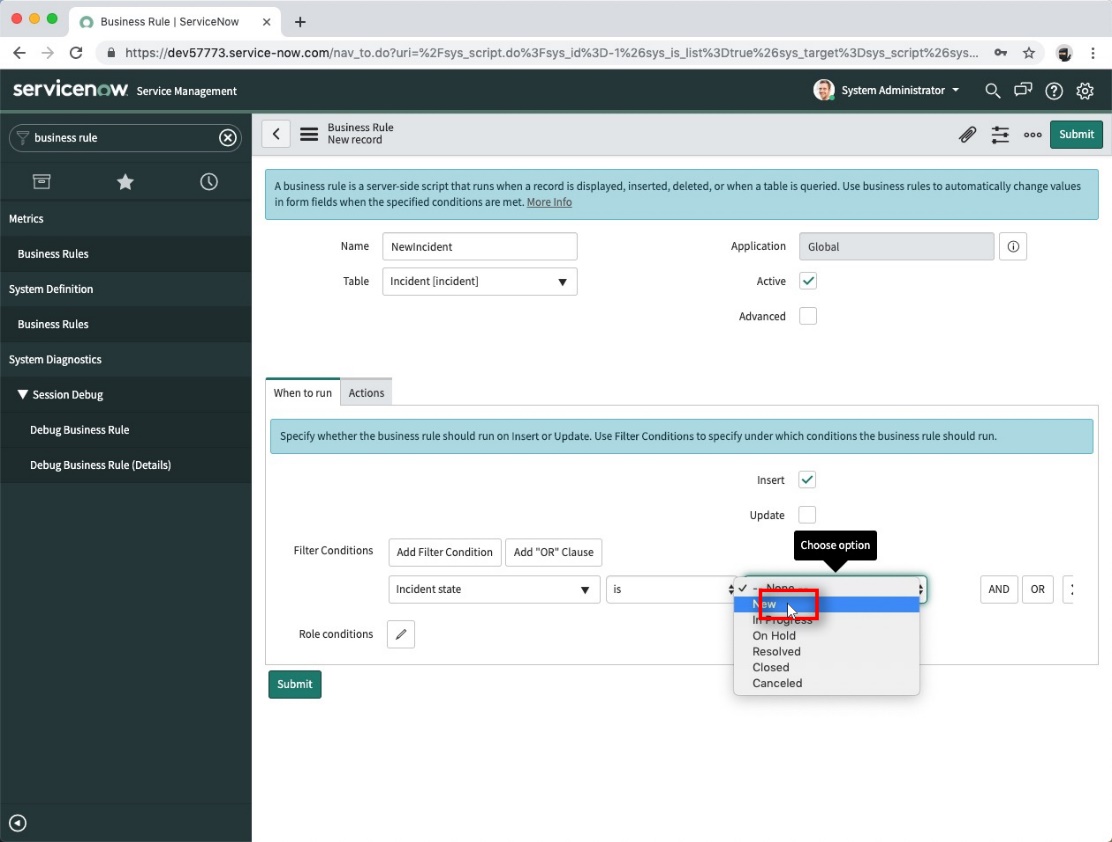
Now you need to specify a condition upon which to execute the Business Rule.
Select a Table field, an operator and a value for your rule.
Select the Advanced box, to enable advanced tab.
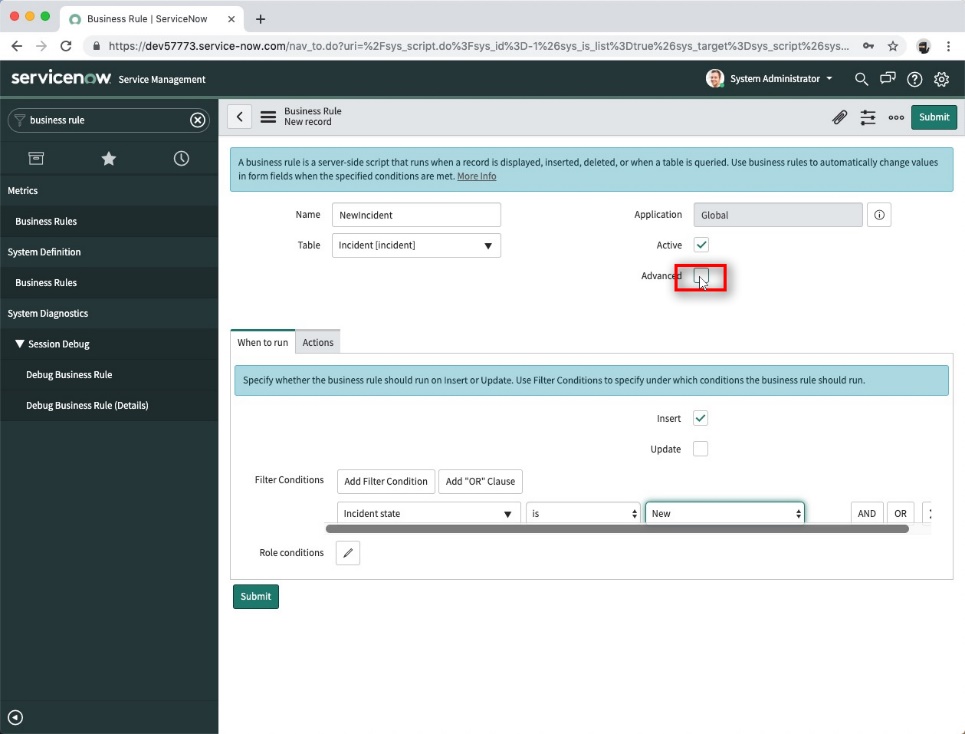
In the Advanced tab. Paste in the script that you generated on the REST screen.
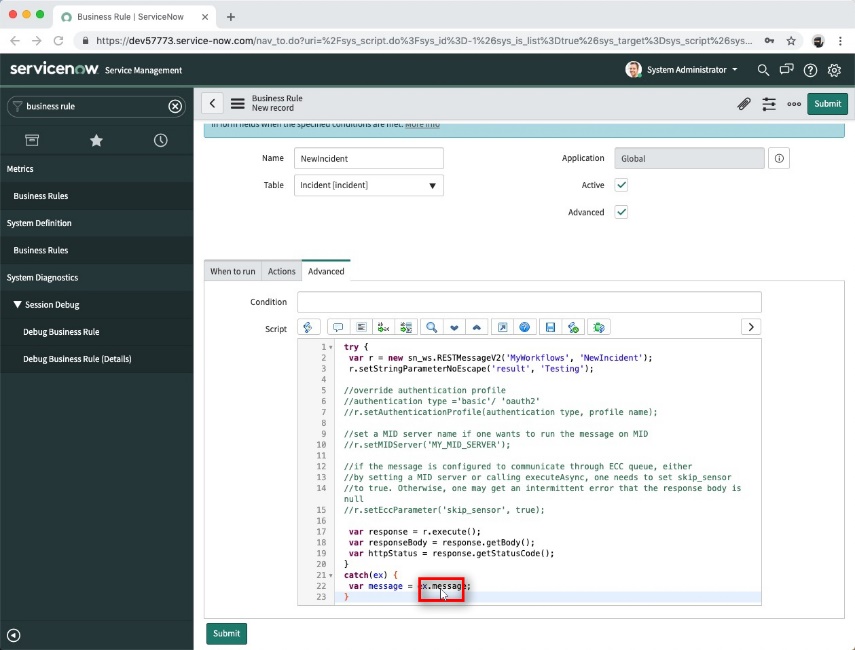
Select "Submit" to save you changes.