# iCollaborate
# New/Edit Page
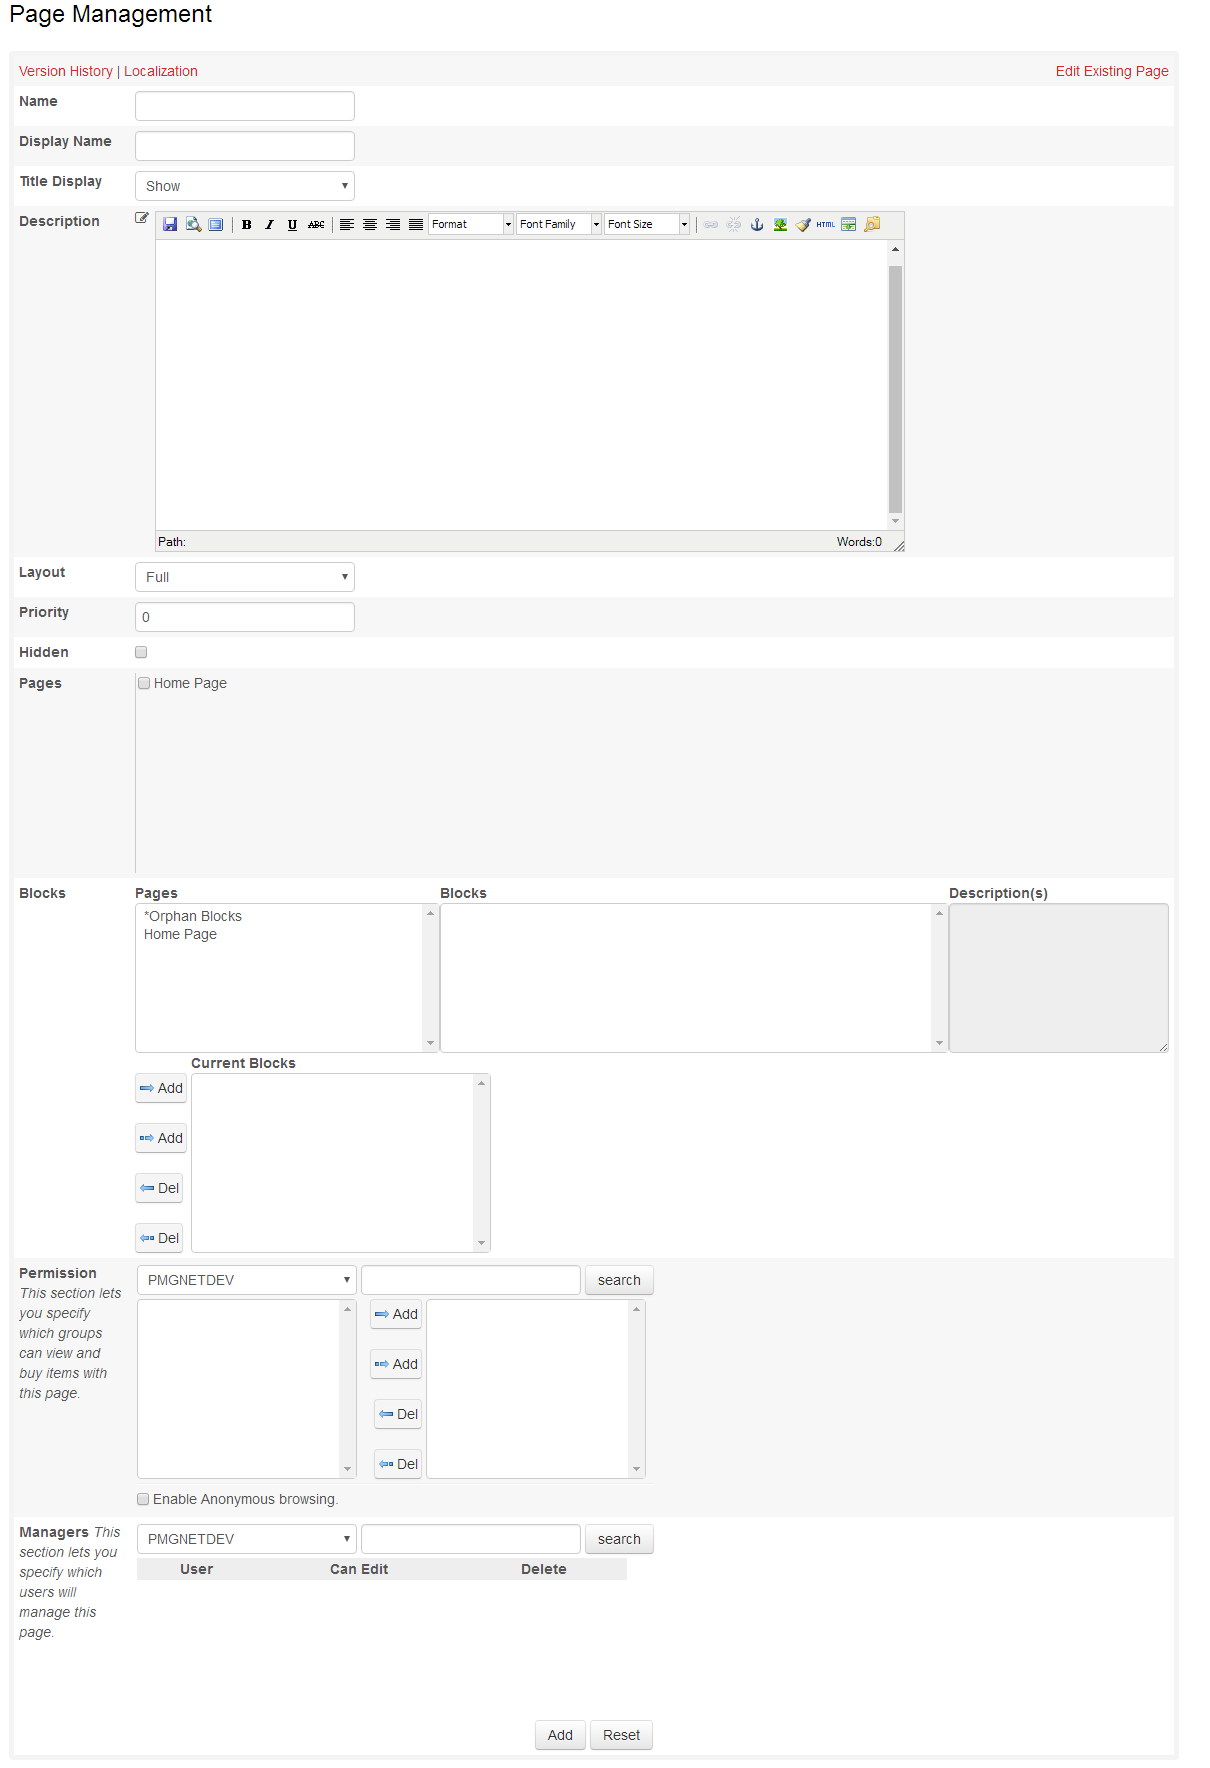
iCollaborate Pages are similar to PMG Service Catalog Categories and are used to group and display Blocks, which are similar to request Services. iCollaborate content is added by first adding Pages (for navigation and content grouping) and then adding Blocks (the actual content within the Pages) to the Pages. Pages which are added will be rendered in the navigation along with the base application navigation. A new Page can be created from ADMINISTRATION, iCollaborate, New/Edit Page.

To edit or create a new Page, the administrator can click on an existing Page name or on the Create New Page link in the upper right-hand corner of the screen.

The Page Management screen provides the following attributes:
Localization: Once a Page is saved, content may be localized, similar to Services
Name: The internal identifying name for the Page
Title Display: Controls page title display behavior
Display Name: The name of the Page shown to end-users
Description: The content shown within the Page, independent of additional content
Layout: Determines if page is shown as a full-page layout or as a block
Priority: Controls the display order of the Page navigation relative to other Pages
Hidden: Sets the Page to not be included in the navigation
Parents: Allows the Page navigation to render the Page under other Page navigation as a sub-menu item
Blocks: Indicates which Blocks are to be included in the Page
Permission: Controls which groups can see the Page
Managers: Controls which other users may manage the Page and Page contents
Once a page is saved, click Browse Page to see the Page and add Blocks. At any time, additional Blocks can be added by navigating to the Page from either the application content management menu, or Administration, New/Edit Page.
To add a Block to a page, click Add New Item (Block). The new Block page provides the following attributes:
Title: The title of the Block
Description: The content (HTML) to show for the Block
External URL: Optionally show an external URL for the Block
Item Image: Image to show with the content
Display Priority: Controls the display order of the Block relative to other Blocks
Pages: Controls which Pages will contain the Block
Permission: Controls which users will see the Block
Managers: Controls which users may manage the Block
To add content to the PMG Portal home page, a Page must be specified for usage. To set the center page content, the name of the Page to be used should be entered as the value for the HOME_PAGE_CONTENT_PAGE system setting.
# Knowledge Management
Knowledge Management consists of Articles, Documents and Links, that are structured and permissioned within Topics. Attributes can be added to configure Knowledge Management to best suit your solution's needs.
# Accessing Knowledge Management Administration
Navigate to Administration > Knowledge Management to open the Knowledge Management Administration page.

# Topics
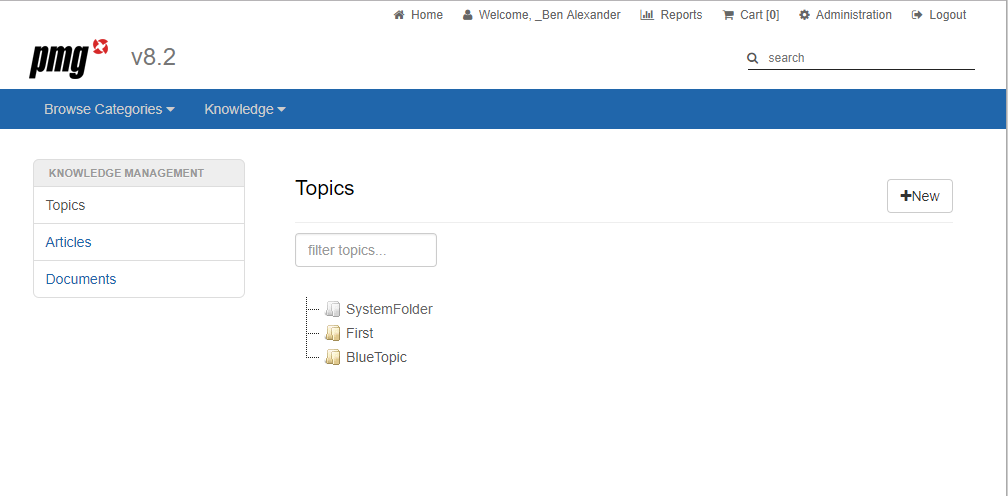
Topics are essentially the folder structure that can be built to organize knowledge and control permissions.
# Creating Topics
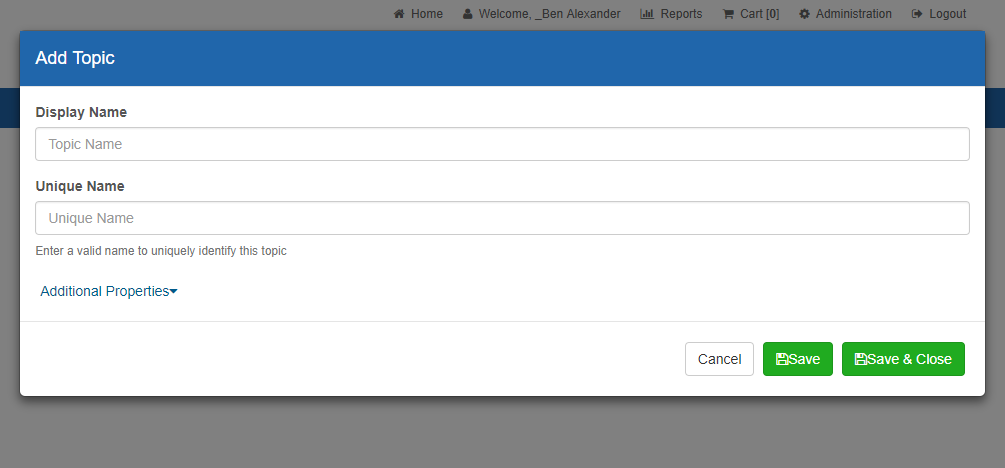
From the Knowledge Management Administration Page, select Topics then select "New". Define the Display Name and the Unique Name of the topic. The display name will be what is displayed to end users and can change over the life of the Topic, while the Unique Name cannot change and must be unique to each topic. At this point you can save the topic, or you can select "Additional Properties" to see the full list of properties that can be configured for the Topic.

The following additional properties can be configured:
Description
Image
Tags
Priority
Hidden Topic
Parent Topic
Permission
# Editing Topics
From the Knowledge Management Administration Page, select Topics, then select the topic you would like to edit. All properties except for Unique Name can be edited. Click Save to save your changes, or Cancel to revert any changes.
# Deleting Topics
From the Knowledge Management Administration Page, select Topics, then select the topic you would like to delete. Select the "Delete" button, then confirm to delete the topic. If any articles are currently under the topic, they will be moved to the System Folder.
# Default Topic – System Folder
SystemFolder is the default Topic. This is the placeholder for all Articles and Documents created where no topic has been selected. This will also serve as the placeholder topic for documents created prior to v8.2. SystemFolder cannot be edited.
# Articles
Articles can include blog posts, how-to’s etc.
# Creating Articles
From the Knowledge Management Administration Page, select Articles, then select "New". The following properties can be configured:
Title
Unique Name
Description
Body
Tags
Topics
Permission
State
# Editing Articles
From the Knowledge Management Administration Page, select Articles, then select the pencil icon of the article you would like to edit. All properties except for Unique Name can be edited. Click Save to save your changes, or Cancel to revert any changes.
# Deleting Articles
From the Knowledge Management Administration Page, select Articles, then select the trashcan icon of the article you would like to delete, then confirm to delete the Article.
# Documents
# Creating Documents
From the Knowledge Management Administration Page, select Documents, then select "New". The following properties can be configured:
Title
Unique Name
Description
Document - This is the file itself
Tags
Topics
Permission
State
# Editing Documents
From the Knowledge Management Administration Page, select Documents, then select the pencil icon of the document you would like to edit. All properties except for Unique Name can be edited. Click Save to save your changes, or Cancel to revert any changes.
# Deleting Documents
From the Knowledge Management Administration Page, select Documents, then select the trashcan icon of the document you would like to delete, then confirm to delete the Document.
# Custom Date
Articles and documents support an optional "Custom Date" field which can be used for additional functionality as needed. For example, this date can be an "Expiration" date for the article which can then be processed on a daily workflow schedule to look for expired articles and retire them.
# Knowledge Management Roles
# Knowledge Manager
Can view articles, documents, and topics via Knowledge Management Administration screen
Can create new articles/documents with any state
Can edit articles/documents in any state
# Knowledge Publisher
Knowledge Publishers have the following capabilities:
Can view articles and documents via Knowledge Management Administration screen
Can create new articles/documents with the following states:
Draft
Review for approval
Archive
Publish
Can edit articles/documents in Draft or Published state
# Knowledge Contributor
Knowledge Contributors have the following capabilities:
Can view articles and documents via Knowledge Management Administration screen
Can create new articles/documents with the following states:
Draft
Review for approval
Archive
Can edit articles/documents in a Draft state
# End User
End users have the following capabilities:
Can access all topics page
Can view contents of a topic
Can view articles
Can comment on an article
Can download a document
Can search for an article
Can search for a topic
Note that end users will only be able to search, see and comment on knowledge that they have appropriate permissions.