# AzureDevOps
The Azure DevOps Connector allows the workflow designer to integrate the application with Azure DevOps/TFS via its REST API.
# Azure DevOps Scenarios
To define scenarios for Azure DevOps, begin by accessing the Scenario management screen either from Administration, Connectors, AzureDevOps, or from Workflow Designer, Manage, Connector Configuration, AzureDevOps.
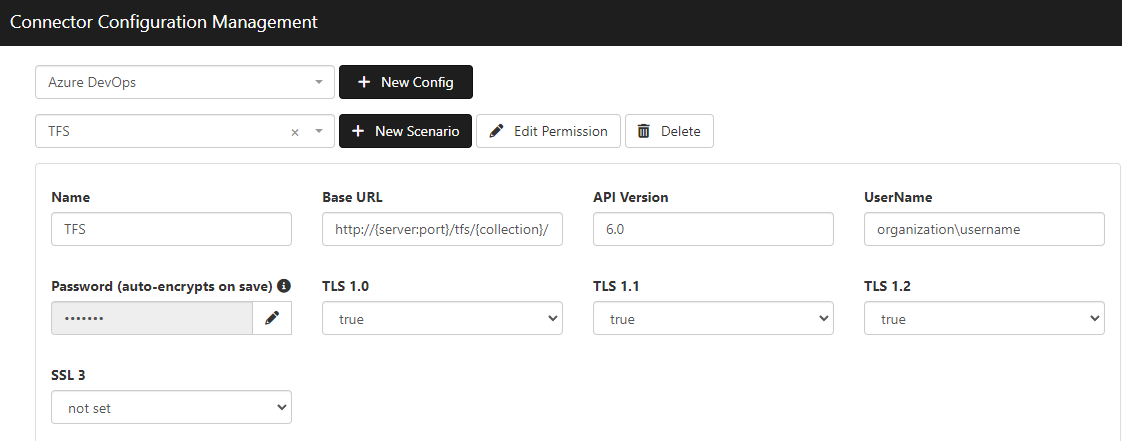
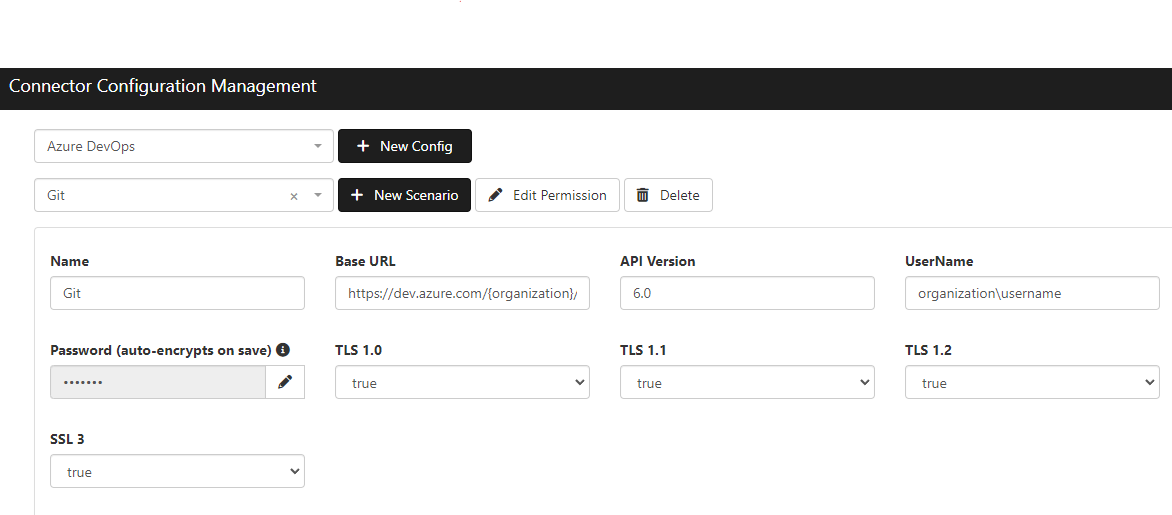
The connector configuration scenarios will be slightly different depending upon if the connection is to TFS or Azure DevOps.


# Base URL
The base URL field points to either an Azure DevOps Services organization or a TFS server, depending on your instance. The base URL should look like this if you're pointing to Azure DevOps:
https://dev.azure.com/{organization}/
It should look like this if you're pointing to a TFS server:
https://{server:port}/tfs/{collection}/
Please note that https can be swapped for http depending on what your instance supports.
# API Version
This link will help determine what REST API Version you should use for your environment:
Rest API Link (opens new window)
# User Name
The user name field should include the domain\username value of a valid user in the environment. The user's permissions determine what REST API operations the connector can perform with this scenario. For example, if the user can create a bug work item in your Azure DevOps UI, the connector should be able to create a bug work item as well.
# Connector Actions
If the connector actions are not visible in the workflow designer, go to Azure DevOps in the Action Management screen and click "Unhide Category."
The Azure DevOps connector currently ships with nine actions. Eight of these actions are editable and can be duplicated and/or updated to generate new actions specific to your Azure DevOps/TFS instance.
# Editing/Creating Actions
There are two action classes that can be used when creating or editing actions.
- PMGSPEUtils.AzureDevOps.Workitem
- PMGSPEUtils.AzureDevOps.GenericAction
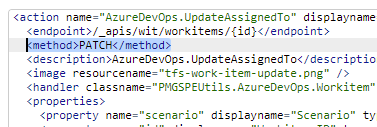
The Workitem class is used to create actions that create or update work items. Actions that use this class can perform the "POST" (create) or "PATCH" (update) methods. To specify which method this action will use, populate the "method" node in the action XML.

The GenericAction class also uses the method XML node to specify the request method. Accepted methods are GET, POST, and PATCH.
# Endpoint
The endpoint to which the action will make a request is defined by the base URL (specified in the connector configuration) and the endpoint XML node specified in the action XML.

Based on these 2 customizations, the action will make a PATCH request to the endpoint:
BaseURL + endpoint node text
# Endpoint Properties
URL replacement values such as {id} are replaced by corresponding action properties with the attribute "endpointproperty."
Example:
The "endpointproperty" attribute value tells the action to replace the {id} value in the endpoint with the property value. For example, this property value:

Would result in an endpoint that looks like this:
BaseURL + /_apis/wit/workitems/17529
Multiple endpoint properties can be included in an action. The property values will automatically be URL encoded. Any static values included in the endpoint node need URL encoding. For example, the "Create PBI" action has the value "Product Backlog Item" URL encoded.

# Query Parameters
Query parameters can be added to the endpoint via the action property XML. The attribute query="true" is added into the property XML to tell the action to include the property name and value as a parameter key value pair in the endpoint.
The property name will be the parameter key and the property value will be the parameter value.
Example:
BaseURL + /_apis/wit/workitems?fields=a,b,c
Query values are automatically URL encoded.
Request Body Adding specific attributes to the property XML will create different JSON structures for the request body.
The Workitem class handles the JSON structure slightly differently than the GenericAction class. The Workitem class will be discussed first.
Workitem Class Request Body To add a property to the request body add the attribute jsonField="true" to the property XML.
Example:
This will add a property to the JSON array request body like this:
[ { "op": "add", "path": "/fields/System.Title", "value": "Sample task" } ]
Notice that the path attribute value corresponds with the path JSON property value. Each path needs to be defined for JSON fields. The operation "op" value defaults to "add" but can be updated by adding an "op" attribute and value to the property XML.
Another example:
The above example include the useHTML="true" attribute key value pair. This tells the action to preserve and send any HTML included in the property value. Otherwise, the HTML with be removed.
Table example:
The table property allows the user to enter in multiple property values which are unknown at action design time. The inner fields XML is expected to match the above format where there is a "Path" property and a "Value" property. The "Path" value corresponds with the "path" JSON property and the "Value" value corresponds with the "value" JSON property.

Would result in this JSON:
[ { "op": "add", "path": "/fields/System.Reason", "value": "Not Fixed" }, { "op": "add", "path": "/fields/System.State", "value": "Active" }, { "op": "add", "path": "/fields/Microsoft.VSTS.Common.ResolvedReason", "value": "" } ]
Updating the "op" attribute is currently ignored for table property.
GenericAction Class Request Body Like the Workitem class, to add a property to the request body add the attribute jsonField="true" to the property XML.
Example:
This will add a property to a JSON object request body like this:
{ "searchText": "propertyvalue" }
To specify what type the property value will be (Boolean, number, string, etc.) use the jsonType attribute:
Available types are:
- string
- integer
- float
- boolean
- string array
- integer array
- jobject
String is the default value and doesn't need to be included in the property XML if this is the desired property value type.
String array example:
{ " values ": [ "a", "b", "c" ] }
NOTE: Values specified for the property such as a, b, and c need to be separated with ||
To create a property in an inner JSON object, use the jsonObjectPath attribute with the value being the object or array property name. If it's nested multiple objects deep, separate each property name with the || symbols.
{ "tracking": { "trackingInfo": "rest api example request", "requesterName": "Example Requester name", "requesterPhone": "555-555-5555", "requesterEmail": "restAPI@example.com" } }
While this:
Will create this:
{ "address": { "home": { "phone": "555-555-5555" } } }
Notice that if you include the realName attribute, it'll use that as the property name for the JSON document. This can be used if you have duplicate property names inside the JSON, with each being at different levels of the JSON document.